This “White Kimchi Recipe” post contains affiliate links. Please read my affiliate disclosure.
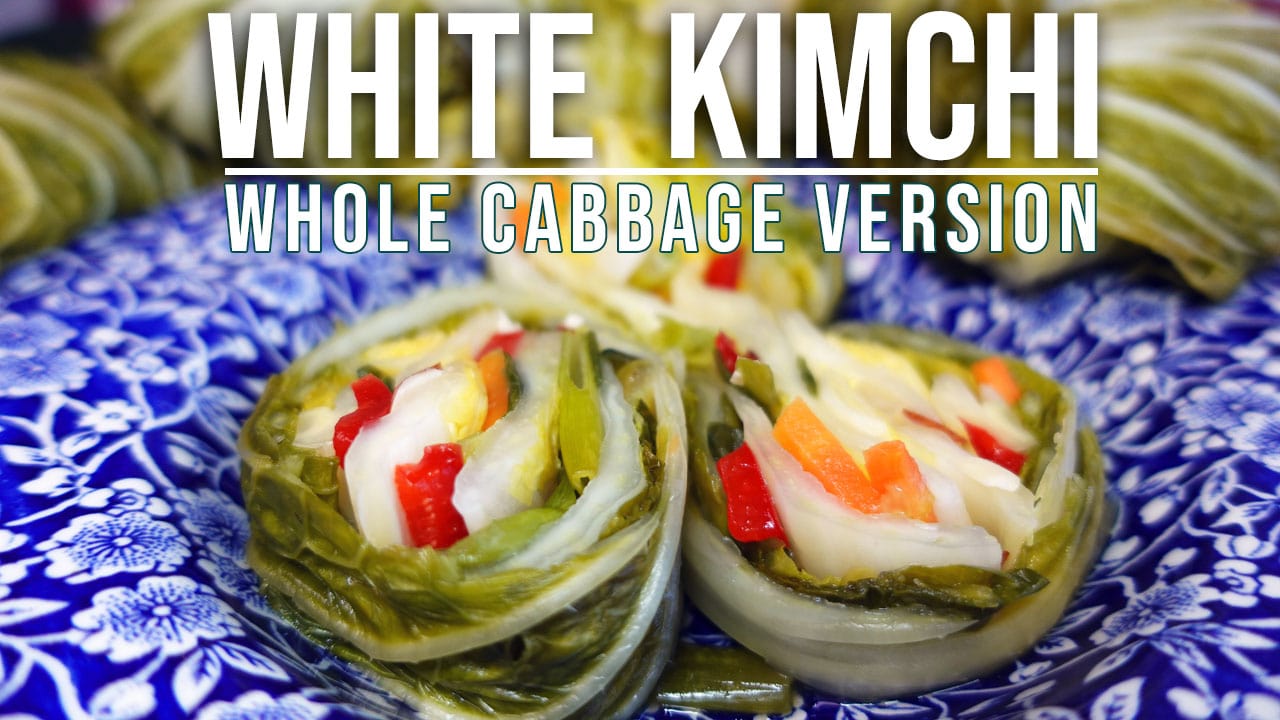
White Kimchi – A Probiotic Korean Delicacy That’s Not Spicy!
Both red and white Kimchi are a Korean cuisine staple. Kimchi is not just a flavorful side dish but also a nutritional powerhouse.
Among the various types of kimchi, one unique variety is white kimchi. Why is white kimchi special? Unlike the red version, white kimchi is not spicy! This can be a lifesaver for some people who can’t take the heat, myself included!
White Kimchi 2 Ways
There are a couple kimchi variations that are important to consider.
Ttong (cabbage buns)
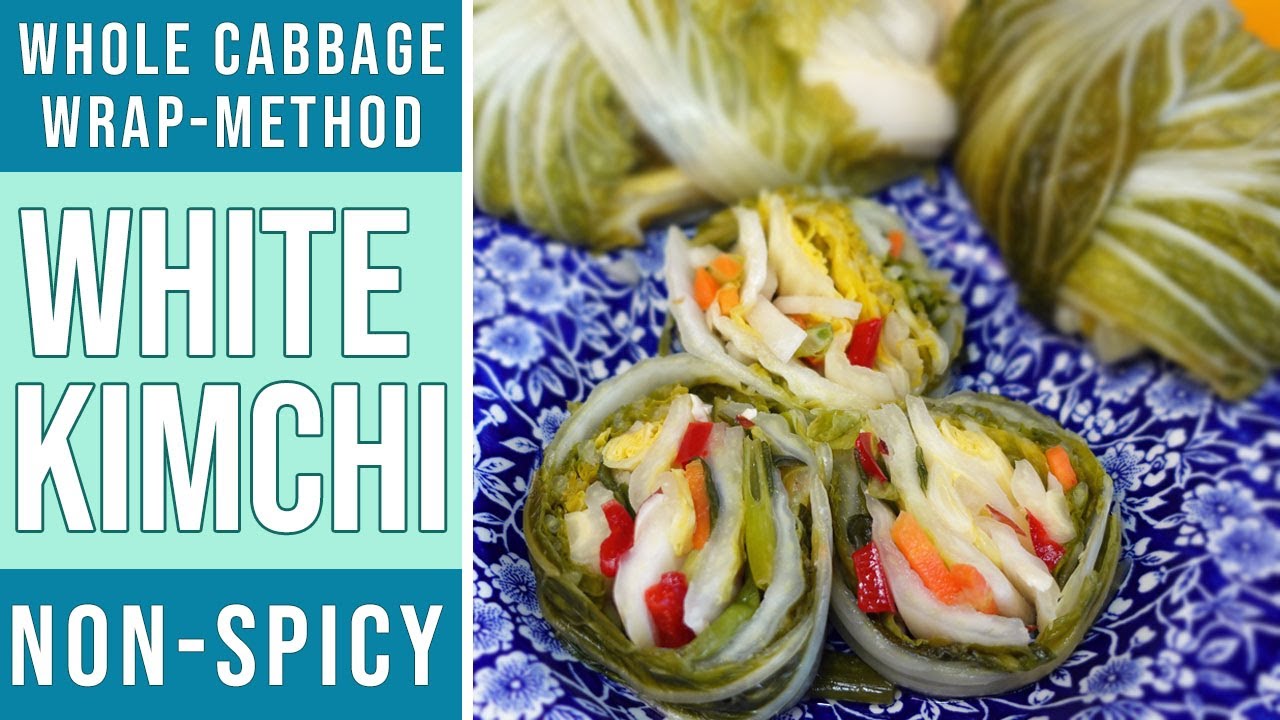
This style of kimchi stuffs whole cabbage leaves and then wraps them into traditional cabbage buns. The wrapping of the cabbage leaves into buns takes a bit more skill level if you are new to kimchi making. But don’t shy away, I’ll walk you through the process step-by-step!
Mak (cabbage sliced)
This style of kimchi slices up the cabbage leaves instead of wrapping them into buns. This is a simpler style that is easier for beginners.
This recipe is for Ttong white kimchi, cabbage buns version! If you’d rather make Mak white kimchi (sliced cabbage version), click here.

Health Benefits of White Kimchi
Before we dive into the white kimchi recipe, let’s understand why kimchi is hailed as a superfood:
1. Probiotic Richness
Kimchi is a fermented dish which means it’s teeming with probiotics that are essential for maintaining a healthy gut microbiome. These healthy bacteria are known as probiotics and they promote digestion, boost immunity, and may even have mood-enhancing effects.1
2. Nutrient-Rich Ingredients
All variations of kimchi, including white kimchi, incorporate various fresh and nutritious ingredients like napa cabbage, radish, carrots, green onions, leeks, bell peppers, and more. These veggies provide essential vitamins, minerals, and antioxidants that support overall well-being.
3. Low in Calories
Kimchi is low in calories but packed with flavor, making it a great addition to weight-conscious diets.
4. Anti-Inflammatory Properties
The garlic and ginger used in kimchi are known for their anti-inflammatory properties, potentially reducing the risk of chronic diseases.2
Just a heads up…
Now that the health benefits have been highlighted, I’m going to walk you through the recipe, step-by-step,
But first, please be aware that the stuffing & wrapping of the cabbage leaves is a technical process. it may be old hat to seasoned kimchi makers, but if this is your first time, you may encounter some challenges. In the video below, I provide a visual demonstration that is very helpful to newbies! OR watch the video on YouTube.
White Kimchi Recipe (Ttong-Cabbage Bun Version)
The measurements for the ingredients are provided in the recipe card at the end of this article.
Napa Cabbage
Napa cabbage, also known as Chinese cabbage, is a key ingredient in kimchi. It has a mild flavor and a crunchy texture, contributing to the overall balance of the dish. Traditional Korean kimchi always uses this type of cabbage.
Daikon Radish
Daikon radish is a large, white radish that is found in most American grocery stores. It adds a crisp texture provides a refreshing contrast to the flavors.
If you live in a city with traditional Asian markets, you can find Mu radish (Korean radish). It too is a large white radish with a similar texture and taste as a Daikon radish.
Carrot
Carrots add sweetness and vibrant color to kimchi.
Green Onions
Green onions, also known as scallions, impart a mild onion flavor. They add a layer of freshness to the kimchi and contribute to its aromatic profile.
Leek
Leeks are part of the onion family and bring a milder, sweeter onion flavor to kimchi. They also contribute to the overall complexity of the dish.
Red Bell Pepper
Red bell peppers add a touch of sweetness and nutrition to kimchi. They also enhance the visual appeal with their vibrant colors.
Cucumber
Cool cucumber adds a crisp and refreshing element to kimchi. It provides a contrast to the fermented flavors and contributes to the overall texture of the dish. You can sub with zuchinni if you prefer.
Chestnuts, PineNuts or Almonds
Believe it or not, chestnuts are a traditional ingredients in Korean white kimchi.
In the United States, chestnuts are typically only available in standard grocery stores around the holiday season If chestnuts are not available to you, substitute with either pine nuts or sliced almonds.
Dates
Dates bring a delicious sweetness to kimchi, balancing out the savory and spicy flavors. They also contribute to the fermentation process by providing natural sugars for the probiotics to feed on. If you live near an Asian market, feel free to substitute with jujubes.
Apple
Apples add a hint of sweetness and contribute to the fermentation process. The natural sugars in apples help feed the beneficial bacteria responsible for fermentation.
Both tart and sweet apples work with this recipe so use the apple variety that best suits your preference.
Ginger
Ginger is one of my favorite flavorings to add to just about any vegetable fermentation. It adds a warmth to the kimchi that balances the cool tones of the vegetables. Ginger is also known for its digestive benefits.
Onion
Onions add a robust and savory flavor to kimchi. They are a common aromatic base in many Korean dishes and contribute to the overall umami profile of kimchi.
Garlic Cloves
This is a crucial ingredient for all types of kimchi. Garlic provides a pungent and savory flavor and is also known for its health benefits. Because it’s naturally high in pre-biotics, it feeds the good bacteria in kimchi and in your gut microbiome.
Fish Sauce (Optional)
Fish sauce is an optional ingredient that adds a savory and umami depth to kimchi. It is a fermented condiment made from fish and salt that contributes to the overall complexity of flavors.
If you are new to the idea of using fish sauces, it may sound unappealing. I get it. But so long as you aren’t vegan, I highly recommend giving this traditional Asian condiment a try. Once fermented, my oh my, it makes the kimchi delicious!
Coarse Salt & Water
Salt is crucial in kimchi making. It tenderizes the cabbage, draws out the natural juices of the vegetables and helps cultivate a favorable fermenting environment for the probiotics. Need I say more?
Coarse Korean sea salt is the traditional salt used in kimchi making, but if you don’t have it available, coarse kosher salt works just as well!
White Kimchi Recipe Instructions
Step 1: Prepare the Cabbage
1. Inspect the outer leaves of the Napa cabbage and remove any damaged or wilting leaves.
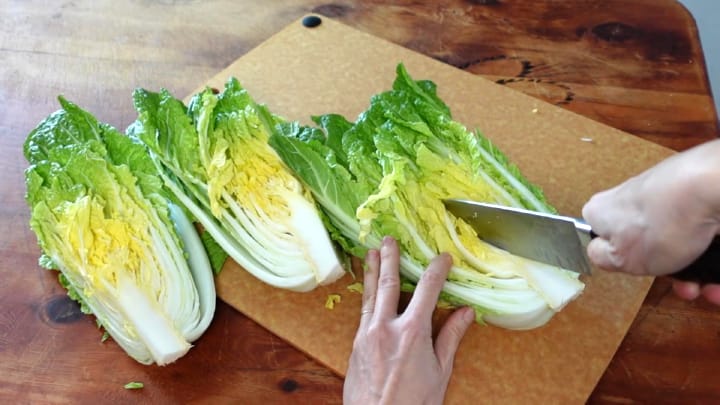
2. Lightly rinse the cabbage, then cut the cabbage lengthwise into four wedges.
- There will most likely be some cabbage scraps remaining after quartering. Therefore, set aside those scraps for later use.
3. Thinly slice off the brown end of the root base. Be careful not to accidentally sever the root base causing the leaves to detach!

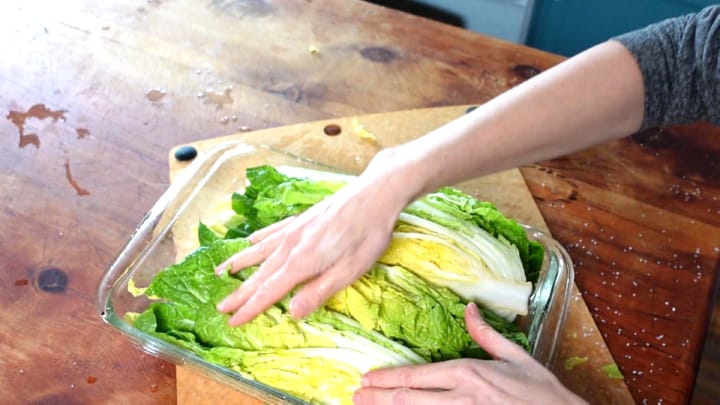
4. Sprinkle the coarse salt between each cabbage leaf, concentrating the salt toward the root base.
Since the cabbage was rinsed beforehand, the moisture on the leaves will help the salt stick.

5. Place the cabbage in a dish aside for 4 to 5 hours, allowing the salt to work on softening the cabbage leaves.
Not only will the salt tenderize the cabbage, but draw out some it’s natural juices so placing the cabbage wedges in a baking dish is important.
Note:
Every hour, rotate the cabbage wedges in the salty-water that will form. This will ensure each side of the cabbage gets equal ‘marinating’ in the salty-water.
Step 2: Prepare the Vegetables
1. Julienne or matchstick the daikon radish and carrot, then add to a bowl.
2. Slice the green onions in 1-inch (2cm) segments. Then slice the leek, bell pepper, and cucumber. Add all the vegetables into the same bowl as the radish & carrot.

3. If using chestnuts, peel and roughly chop them up. (They’re a soft nut!)
Next, add the chestnuts to the bowl.

4. Slice the dates or jujubes and add them to the bowl.
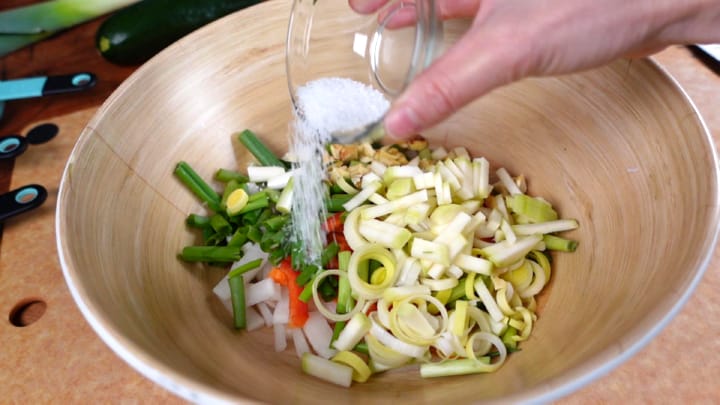
5. If using fish sauce, sprinkle it over the mixture in the bowl. Then give a toss with a spoon to coat all the vegetables.

6. Sprinkle salt over the mixture. The salt will draw out the natural juices and create a flavorful liquid that will enhance the overall white kimchi flavor.
Set the vegetable mixture aside for later use.
Step 3: Rinse the Cabbage
1. After the cabbage has been resting in the salt for 4-5 hours, rinse the cabbage wedges under running water to remove the remaining salt.
- It’s helpful to first dunk the wedges in a large bowl of fresh water, then rinse in between the leaves.
2. Place the cabbage wedges in a colander to drain for 30 minutes to an hour. Meanwhile, the kimchi broth can be made.

Step 4: Prepare The Broth
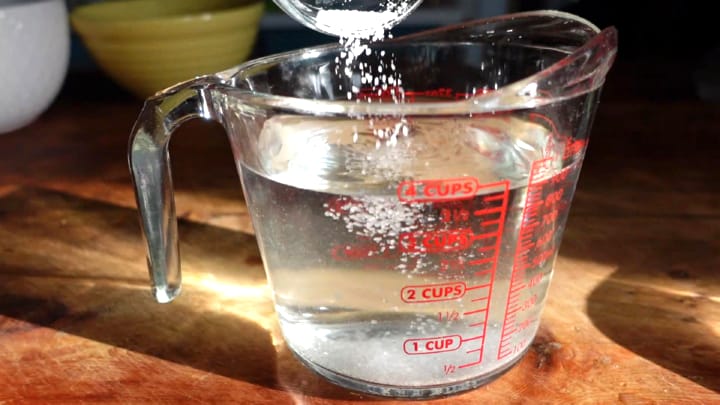
1. First, prepare a salt water brine by combining salt and water, mixing thoroughly. The salt measurement will depend on whether or not you used fish sauce with the vegetables. Remember, you will find all the measurements are provided in the recipe card at the end of this article.
2. To make the broth, cut the apple, garlic, fresh ginger root, onions into large chunks and add to a blender or food processor. Next, add plain water (not the salt water brine) and blend all the ingredients until smooth.

3. Filter the blended mixture 2 times by pouring it through a fine mesh strainer.
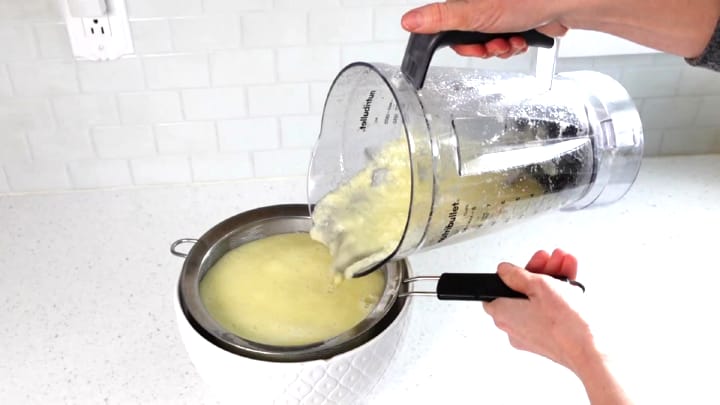
Work the mixture around with a spatula until the pulp is dry and then discard it. This can take a minute or two so have patience.
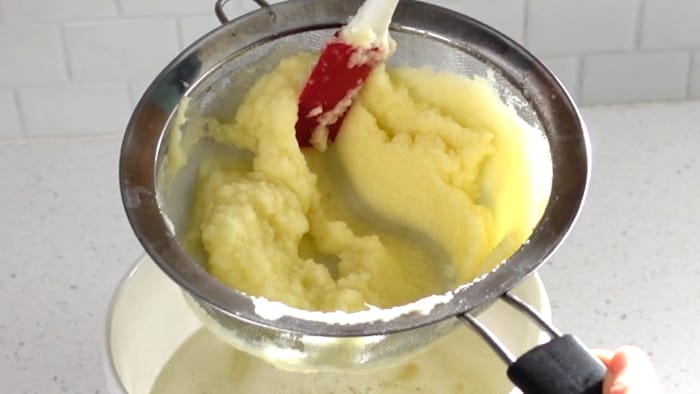
Clean out the strainer and then pour the liquid broth through again.
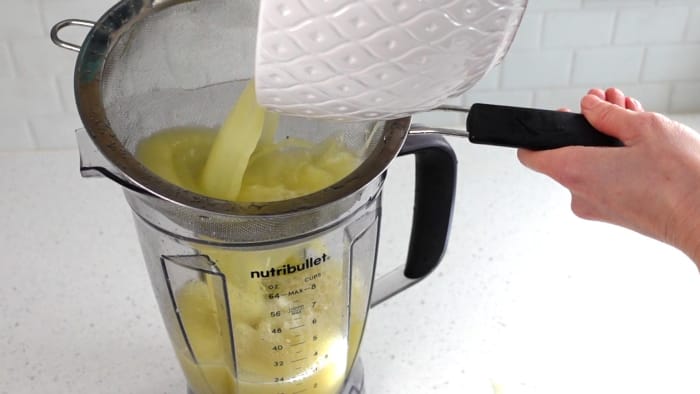
After pouring the broth through for the second time, there should be only a little pulp remaining. Next, pour the salt water brine through and discard any pulp that remains in the strainer.
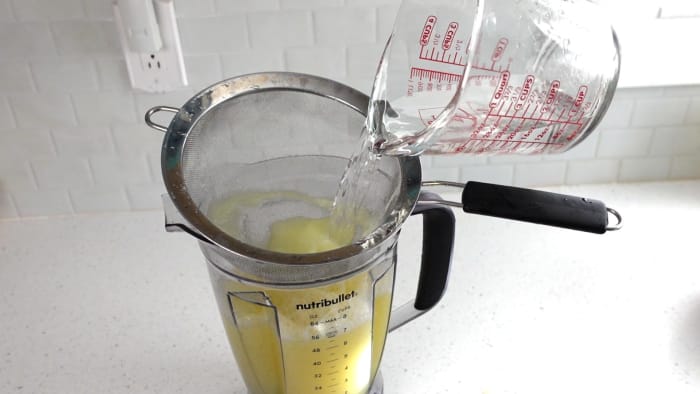
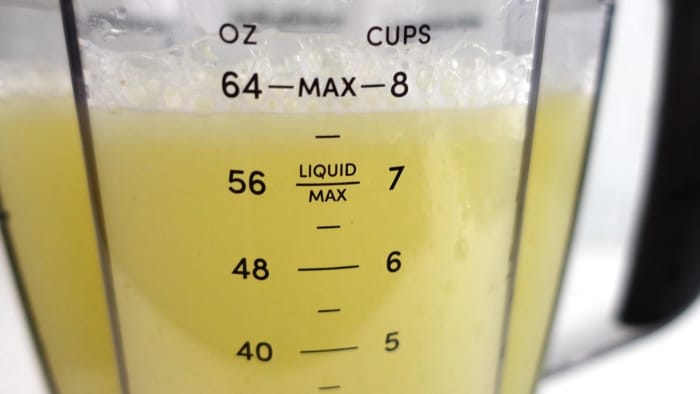
The broth should be a relatively clear, thin and beautiful yellow color.
Step 5: Prepare To Wrap Things Up
The Fermenting Vessel
Once the cabbage wedges are stuffed & wrapped, they will be referred to as cabbage buns.
A large food storage container will be needed to hold the cabbage buns with all the broth poured overtop. Therefore, be sure the storage container is quite deep so it can hold all the food and liquid combined.
This is where my White Kimchi video may be the most helpful since I provide a visual demonstration on how to do the following cabbage stuffing & wrapping steps.
Getting Things In Place
Remove the cabbage wedges from the colander in the sink where they were draining and place them in the same baking dish previously used to salt them. The cabbage wrapping will take place in the baking dish to catch the vegetables that may spill out during the stuffing & wrapping process.
• Bring near the bowl of marinating vegetables & broth to the baking dish holding the cabbage. The quartered cabbage leaves will first be stuffed with the vegetable mixture and then wrapped into ‘buns’.
• Remember the cabbage scraps set aside from earlier? Place them into the bottom of the food storage container.
• Add a couple scoops of brine to the bottom of the container.

Step 6: Stuff & Wrap The Cabbage
Pick up a cabbage wedge and separate the bottom two leaves without detaching them. These bottom 2 leaves are not to be stuffed with the vegetable mixture because they will be used to wrap the cabbage into a bun after the rest of the leaves are stuffed.

Skipping the bottom 2 leaves, place a small amount of the vegetable mixture in between each leaf, concentrating toward the root end.

- Lay the next leaf down and stuff with the vegetable mixture.
- Repeat until the leaves are too small to further stuff.

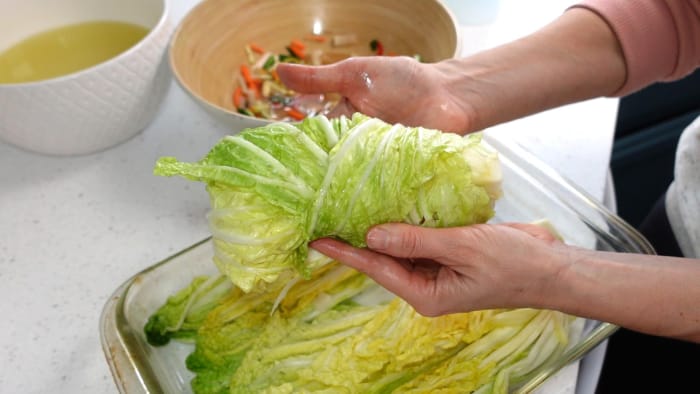
Pick up the stuffed cabbage and fold the top end over.
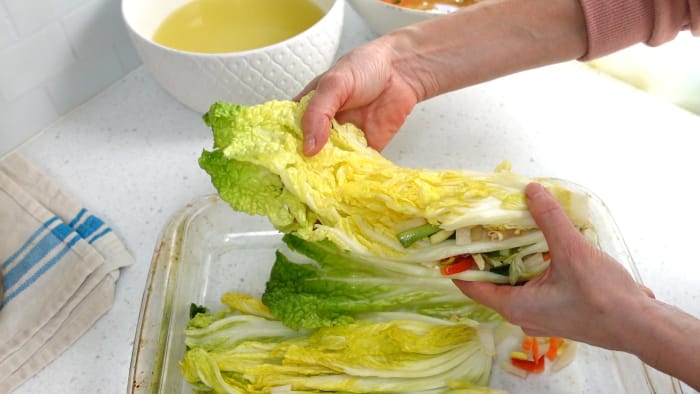

Without tearing the bottom 2 leaves that were not stuffed, use them to wrap the cabbage. You’ll do this by holding the cabbage with one hand and with the other hand, bring each of the leaves from underneath up and around from opposite sides in a criss-cross fashion.
For example, in the photo below, I have brought one of the bottom leaves up from the left side and wrapped across to the right.

As I proceed, I now bring the other bottom leaf up from the right side and wrap it across to the left.

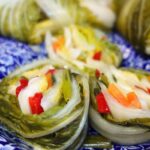
Now I have a stuffed & wrapped cabbage bun!
Place each of the wrapped cabbage buns into the food storage container.
- Once all the cabbage buns are complete and in the container. add any remaining vegetable mixture overtop.

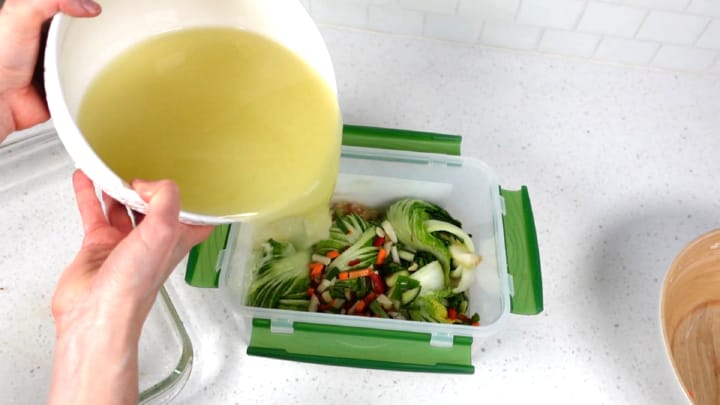
Step 7: Add the Broth
Pour the prepared broth over the cabbage buns, ensuring they become fully submerged. Use fermentation weights atop the cabbage buns to hold them down beneath the broth.
- The broth serves as the white kimchi’s brine. When the broth fully covers the cabbage buns, it protects them from possible bad pathogens and allows for a successful fermentation. This is why complete submergence of the cabbage under the broth is important.
Step 8: Add The Lid
Place the lid onto the food storage container, but leave one corner not sealed. This will allow for the fermentation gasses to escape.

Optional White Kimchi Container:
If you want to upgrade the food storage container, try an official kimchi container like this one!
- Four cabbage buns fit perfectly in a 1 gallon kimchi container.
- The vessel is plenty deep to not only hold the cabbage buns, but all the broth as well.
- Additionally the container can be used for other fermentations such as making sauerkraut & pickles.
- A built-in internal mechanism presses down and securely holds the cabbage (or other fermented food) under the broth (aka: brine). No additional fermenting weight is needed!
- If you don’t have any fermentations going, use it as a storage container for regular foods.
- The container fits nicely in the refrigerator.


Plan B: If Things Go Wrong
- If wrapping the cabbage becomes challenging, perhaps even disastrous, you can revert to making sliced kimchi (mak kimchi) instead!
- Simply slice up all the cabbage quarters instead of wrapping into cabbage buns.
- Place all the cabbage and vegetables, including their juices, into the food storage container OR glass jar(s).
- Pour the broth/brine over everything just as you would have done with the cabbage buns.
- Now you have Mak White Kimchi! A different style, but all the same outstanding fermentation flavors & nutritional benefits.
- The fermentation period is the same as Ttong white kimchi and so are the storage instructions that are provided below.

The Fermentation Period
Leave the kimchi on the countertop for 48 to 72 hours to ferment (max 5 days). The white kimchi ferments quickly because of the abundant natural sugars in the fruits & vegetables!
Within 24-48 hours you will see lots of bubbles forming. These are carbon dioxide bubbles created by the good microbes that are busy fermenting the kimchi!
Feel free to taste test the kimchi broth and some of the loose cabbage pieces beginning on day 2 or 3. If it’s delicious, feel free end the fermentation period & dive in!
If you would like the flavors to develop further, including an increased sour-tanginess, allow the kimchi to remain on the counter for another 2 or 3 days.
How To End The Fermentation & Storage
Once you decide to end the fermentation period somewhere between days 2 to 5, secure the container’s lid on tight and transfer it to the refrigerator.
The kimchi can last many weeks to even months thanks to the cold temps of the fridge. FYI: The kimchi cannot be stored at room temperature; it must be stored in the refrigerator.
White kimchi can be enjoyed the very first week (also known as the sparkling period because of the bubbles) or allowed to continue slowly fermenting up to three more weeks in the refrigerator before taking the first bite.
Therefore, whether you choose to dive in during the sparkling period, or wait a few more weeks before enjoying, the white kimchi flavors will continue to evolve and develop flavorful depth.
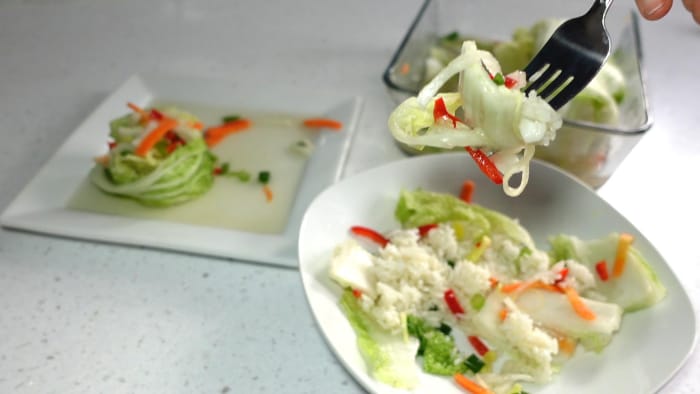
How To Eat White Kimchi
When you’re ready to eat a cabbage bun, you may wonder how to go about it!
With clean washed hands, reach into the container and pull out a cabbage bun. Next, with a sharp knife slice the bun into thirds.
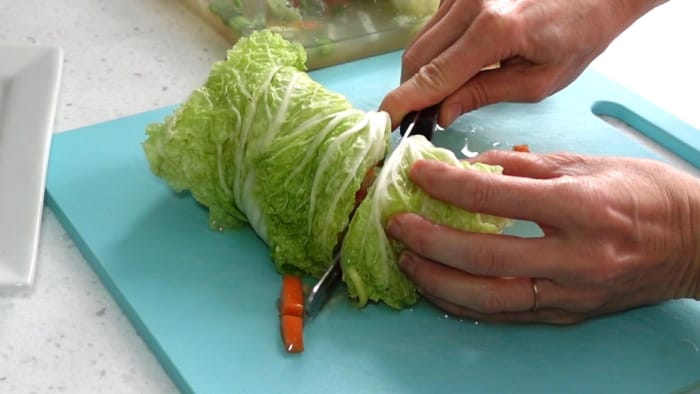

From here you can use a fork or chopsticks to pick up scrumptious bites of the kimchi. You can pair the white kimchi with various dishes, such as rice, fish, chicken, or noodles. A few generous spoonfuls of the non-spicy white kimchi broth over cooked rice and/or beans is delicious!
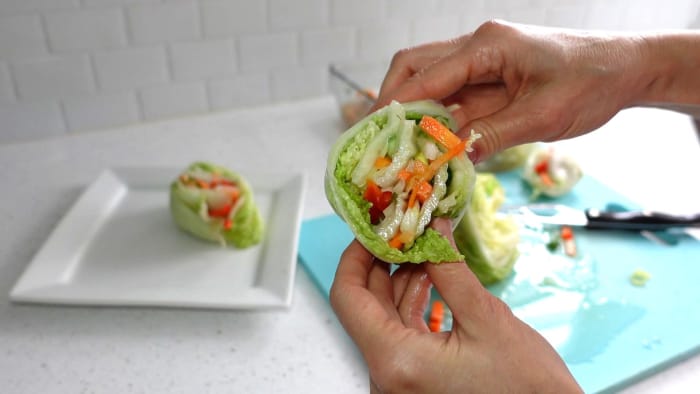
I provide even more scrumptious & inspirational white kimchi ideas at the end of this article so keep reading!

You can also slice the cabbage buns into large segments and showcase them at dinner parties since they present so beautifully!

Troubleshooting
If the fermentation doesn’t go as planned:
- Ensure the cabbage has been fully submerged beneath the broth. The broth protects the cabbage from harmful pathogens and creates an optimum environment for the beneficial bacteria that do the fermenting.
- Consider factors like temperature and cleanliness. If the room temperature is below 70°F (21°C), it will not ferment very well. The beneficial bacteria responsible for a successful fermentation like to be warm!
- 75-85°F (23-29°C) is the ideal temperature range so that the microbes can get busy doing their fermentation job quickly!
15 Ways to Eat White Kimchi
Here is a HUGE list of things you can do with Kimchi!
However remember that heating probiotics will kill them, so if you’re only after the incredible flavor and not the probiotics, by all means go ahead and heat it up. Otherwise, don’t cook it! Instead add the white kimchi to the dish after the cooking has commenced.
Here are some creative ways to use white whole leaf kimchi in your diet:
1. Kimchi Salad:
Toss some white kimchi in with fresh greens, such as lettuce or spinach. Then drizzle with some of the broth for a tangy salad & dressing.
2. Kimchi Rice Bowl:
Top a bowl of steamed rice with white kimchi, sliced avocado, a fried egg. Sprinkle some sesame seeds overtop for a satisfying and nutritious meal.
3. Kimchi Quesadillas:
Add white leaf kimchi to your quesadilla fillings for an unexpected twist. It pairs well with cheese, shredded chicken, or tofu.
4. Kimchi Tacos:
Use white kimchi as a topping for your favorite tacos. It works especially well with grilled or spicy meats like pork or beef.
5. Kimchi Soup:
Add white kimchi to a pot of broth along with vegetables and protein (tofu, chicken, or shrimp) to make a flavorful and spicy kimchi soup.
6. Kimchi Fried Rice:
Stir-fry cooked rice with vegetables and your choice of protein. After the cooking add some white kimchi within the mix for a quick and tasty meal.
7. Kimchi Pancakes:
Mix chopped white kimchi into a savory pancake batter and pan-fry until crispy. Serve with a dipping sauce.
8. Kimchi Sandwich:
Use white kimchi as a condiment in sandwiches or burgers for an extra kick of flavor.
9. Kimchi Tofu Stir-Fry:
Cube tofu and stir-fry it with white kimchi, vegetables, and your favorite stir-fry sauce for a quick and delicious vegetarian dish.
10. Kimchi Omelet:
Fold white kimchi into your morning omelet for a zesty and nutritious breakfast.
11. Kimchi Pizza:
Use white kimchi as a pizza topping along with cheese, bacon, and other ingredients for a unique pizza flavor.
12. Kimchi Grilled Cheese:
Add white kimchi between slices of cheese and bread when making a grilled cheese sandwich.
13. Kimchi Sushi Rolls:
Incorporate white kimchi into homemade sushi rolls for a zesty twist on traditional sushi.
14. Kimchi Ramen:
Enhance a bowl of ramen by adding white kimchi and its broth for extra flavor.
15. Kimchi Dip:
Puree white kimchi with cream cheese or Greek yogurt to create a tangy dip for vegetables or chips.
Enjoy experimenting with these ideas to incorporate non-spicy white kimchi into your daily meals!

White Kimchi
Equipment
- 1 Large Food Storage Container This is what the kimchi will ferment in
- Blender or Food Processor
- Fine mesh strainer
- Colander
Ingredients
- 1 2-2.5 lb Whole Napa Cabbage see notes at the end for a larger recipe size
- ½ cup Daikon Radish julienne or matchstick sliced
- ¼ cup Carrot julienne or matchstick sliced
- 6 Green Onions
- ⅓ cup Leek sliced
- ¼ cup Red Bell Pepper sliced or chopped
- 4-5 Chestnuts sliced or chopped. Sub with slivered almonds or pine nuts
- ¼ cup Zucchini or Cucumber julienne or matchstick sliced
- 2 Dates sliced (dried or fresh) sub with jujubes
- ½ cup Coarse Salt (for wilting the cabbage)
- 2½ tbsp Fish Sauce optional
- 2 tsp Coarse Salt (for the vegetables)
- 3 c Water (for the broth)
- 1 Apple extra large size of any variety
- 2 Onions medium size of any color
- 3-6 in Ginger peeled, fresh root
- 4 c Water (for the broth brine)
- 1-1.5 tbsp Salt (for the broth brine) see notes in broth section of instructions
Instructions
Prepare the Cabbage
- Inspect the cabbage. Remove any leaves that are bruised, damaged, wilted or yellowing.
- Quarter the cabbage lengthwise into 4 wedges.
- Thinly slice off the brown at the base of the stem. Be careful not to cut off or compromise the stem. The cabbage leaves need to stay attached.
- Quickly and lightly rinse water over the cabbage wedges, no need to drain. This shot of water is not for washing purposes, but so the salt will stick to the cabbage for the brining process. Place the wet cabbage in a large baking dish that is approximately 11x9in (22-28cm) in size. The dish will catch the salty water that will drain from the cabbage.
- To brine the cabbage, sprinkle in increments the ½ c (150 g) of coarse salt between each of the cabbage leaf layers. Sprinkle a little heavier near the root end of the leaves. If you need to use more salt to cover all the leaves, that is ok. The given measurement is more of a suggestion.
- Once the salt is sprinkled throughout the cabbage leaves on all 4 wedges, set a timer for 1 hour. The entire brining process will take 4 to 5 hours.
- At the 1 hour mark, move each cabbage wedge around in the salt water, rotating it to cover all the sides of the wedge. If the wedges began facing up, leave them now facing down. Or if the wedges began by laying on one edge, leave them now laying on the opposite edge.
- While the cabbage is brining, proceed to the next step.
Prepare the Vegetables
- Matchstick or julienne the radish, carrot, and cucumber. Then add to a large mixing bowl.
- Slice the green top of the green onions (scallions) in about 1 inch (2.5 cm) segments and add to the mixing bowl. Omit the white root end.
- Slice or chop the red bell pepper and add to the mixing bowl.
- Peel the outer shell from the chestnuts. Afterwards, cut off any remaining hard-orange skin remaining. Next, chop and add to the mixing bowl. Substitute with sliced almonds or pine nuts.
- Slice and add the dates or jujubes to the mixing bowl.
- Optionally, sprinkle the fish sauce over the vegetables in the bowl. Omit if you prefer.Mix the vegetables around so that they are coated with the sauce.
- Sprinkle the 2tsp (13g) salt over the vegetables. Add this same amount of salt regardless if you omit the fish sauce.
- Mix to incorporate everything together and set aside. The vegetables will marinate until they're ready to be used later. While waiting for the cabbage wedges to complete the brining period, this is a good time to do tasks around the house or run some errands. It's not a problem if the cabbage wedges brine for longer than the allotted time specified.
Rinse the Cabbage
- Once the 4-5 hours have completed, return to the cabbage. First dunk each cabbage wedge in a bowl of fresh water. Then rinse each wedge thoroughly under neutral-temperature water. Rinse as much of the salt out of the cabbage as you can. The cabbage should be soft & flexible without breaking when bent.
- Gently squeeze out the extra water from the leaves with your hands and place the wedges in a colander. Allow them to drain for 30 minutes to an hour. While the wedges are draining, proceed to making the broth in the next step.
Prepare the Broth
- Combine the salt and 4c (950ml) water to make a saltwater brine that will be added to the broth. Add the salt measurement based on whether or not you used fish, then set aside.NO Fish Sauce: 1.5 tbsp / 29 g medium coarse saltYES Fish Sauce: 1 tbsp / 19 g medium coarse salt
- Peel, quarter & core the apple. Add to a blender or food processor.
- Peel and quarter the onion. Add to the blending vessel.
- Add the 12 cloves of peeled garlic. Add to the blending vessel.
- Peel and cut the ginger into large chunks. Add to the blending vessel.
- Add 3 cups (710 ml) plain water to the blending vessel and blend until silky smooth.
Strain The Broth
- The broth will be strained 2 times. Pour & filter back and forth from the blending vessel to a bowl, then back to the blending vessel. 1st strain: pour the broth mixture through a fine mesh strainer into a large bowl. Then use spatula to work the liquid through. This will take a couple of mintues so have patience.Work the pulp until it is dry enough to hold it's shape when the spatula runs through it. Discard the remaining pulp from the strainer and rinse the strainer before the next round.2nd strain: Again, pour the mixture through the strainer. No need to work it with a spatula this time.Next, pour the salt water brine through the strainer. Discard any pulp remaining in the strainer.The broth should be relatively clear, thin and a beautiful yellow color.Set the broth aside for later use.
Prepare for Cabbage Wrapping
- Remove the cabbage from the colander and place the wedges back in the baking dish. The baking dish will catch any loose vegetables that fall out during the wrapping process. Bring the cabbage wedges in their dish, he bowl of vegetables and broth into the same work area. You will also need the large storage container to place the finished cabbage into along with the broth.
- With a scoop, add a little broth to the vegetables in the bowl.
- Remember the cabbage scraps set aside from earlier? Add them to the bottom of the food storage container. Next, add a little broth to the cabbage scraps.
Note: It is important that the food storage container is not only large enough to hold all 4 cabbage buns, but is deep enough so when the broth is added, it’s able to fully submerge the cabbage buns. A baking dish or casserole pan will not work because it’s too shallow.
Wrapping the Cabbage
- Note: If you are new to wrapping kimchi, then this step is best paired with the video for a visual demonstration since it can be challenging without previous experience. Pick up a cabbage wedge and separate out the bottom two leaves without detaching them from the stem. These are the 2 leaves that will ‘wrap’ the cabbage. Therefore, do not stuff them.
- Starting with the 3rd leaf, place a small amount of the vegetable mixture onto the leaf, concentrating near its root base. There is no need to fill the leaf beyond a couple of inches (5cm) up from the base. *Do not over-stuff the leaf.
- Lower the next leaf and fill the same way. Repeat until the leaves are too small or thin to continue.
- Once stuffed, pick up the cabbage. With one hand, hold it from the underside of the 3rd leaf (allowing the 2 bottom leaves to hang). We’ll call this your supporting hand. With your other ‘free’ hand, gently fold over the top end of the cabbage leaves. Once folded over, hold it down with the thumb of your supporting hand.
- Again with your free hand, reach under and select 1 of the 2 bottom leaves that were separated from the rest. Tightly wrap it up, over and around the cabbage. Repeat with the other leaf, wrapping up & over the opposite side.The wrapping is a criss-crossing of the leaves. For example, if the left leaf is selected, bring it up and over-top the right side of the cabbage. Then select the other leaf and bring it up and over-top the left side of the cabbage.
- If successfully wrapped, you should now have a cabbage bun! Place the bun into the food container.
- Repeat this process with each of the 4 cabbage wedges.
Add the Broth
- With all 4 cabbage buns placed in the food container, add any remaining vegetables there may be.
- Pour all of the broth over the cabbage buns. The cabbage should be 100% submerged.
- The cabbage buns will want to float. To hold them down either use the built-in device of a kimchi container or use regular glass fermenting weights placed atop the buns to hold them down. (You’ll just need to pull the weights out later when you’re ready to eat the kimchi). If you do not have neither a kimchi container or glass fermenting weights, you will need to dunk the cabbage (using a clean utensil) in the brine a minimum of twice daily. This will prevent fermentation funk from developing as well as protect the cabbage from potential spoilage due to oxygen exposure. Brine coverage is the ‘safety’ for fermenting vegetables.
- Place the lid or cover on the container.
The Fermentation Period
- Leave on the countertop at room temperature for 72 to 120 hours (3 to 5 days). Then transfer to the refrigerator for long term storage.In some Korean household traditions, they will eat the kimchi during the first 3 to 5 days. This period is known as the sparkling period when there are lots of fermentation bubbles. Other Korean traditions will place it in the refrigerator after the countertop fermentation period and allow it to continue slowly fermenting for 3 more weeks in the refrigerator… then they’ll eat it. There are no rules as to when you must eat the kimchi, nor what you eat it with or how. Simply enjoy to your own taste & pleasure!Note: I have made salt quantity changes since the publication of the YouTube video. Therefore the salt measurements in this written recipe are different from what's stated in the video.
Video
Notes
|
|
Citations
- Snyder, C. (2023, February 13). 9 surprising benefits of Kimchi. Healthline. https://www.healthline.com/nutrition/benefits-of-kimchi
- Raman, R. (2023, February 16). 9 herbs and spices that fight inflammation. Healthline. https://www.healthline.com/nutrition/anti-inflammatory-herbs
More Recipes …

Fermented Carrot Salad
Stuffed Fermented Peppers
Fermented Beans
Fermented Garlic
Sauerkraut Masterclass