This Fermented Carrots post contains affiliate links. Please read my affiliate disclosure.
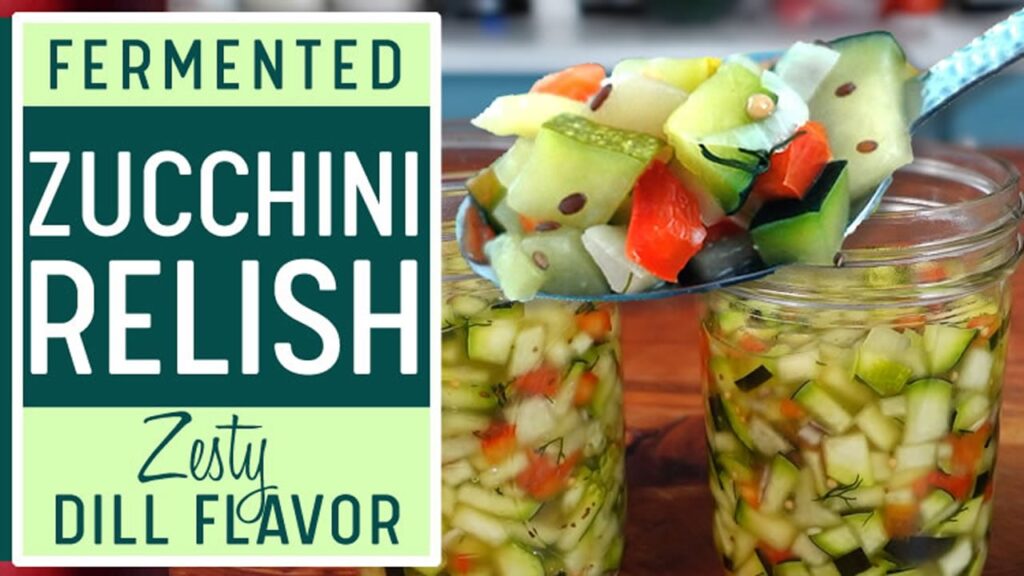
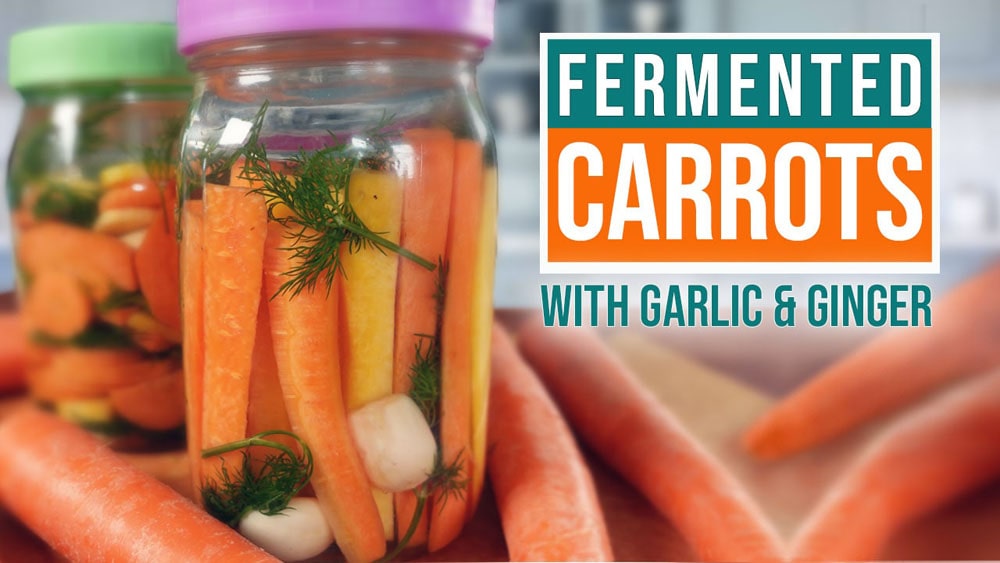
How To Ferment Carrots: A Delicious Probiotic Snack
Fermented foods have gained popularity in recent years and for good reason. Not only do they provide a burst of flavor, but they also offer numerous health benefits, primarily due to the presence of probiotics.
One such delightful and easy-to-make fermented treat is none other than fermented carrots. In this article.
I’ll guide you through the simple step-by-step process of making these tangy, probiotic-rich snacks and explore the benefits of incorporating carrots into your daily diet.

The Health Benefits of Carrots
Before delving into the art of fermenting carrots, let’s take a moment to appreciate the health benefits of this vibrant root vegetable:
1. Rich in Nutrients:
Carrots are a great source of essential vitamins and minerals, particularly vitamin A, vitamin C, and potassium. These nutrients are vital for maintaining overall health.1
2. High in Fiber:
Carrots are fiber-rich, which aids in digestion and promotes a feeling of fullness, making them an excellent addition to weight management plans.1
3. Antioxidant Power:
Carrots are loaded with antioxidants, including beta-carotene, which supports the immune system and reduces the risk of chronic diseases.1
4. Probiotic Potential:
When carrots are fermented they become a natural source of probiotics. Probiotics are beneficial bacteria that promote a healthy gut microbiome, aiding digestion and supporting the immune system.2
Ferment Carrots Along With Me!
Instructions for making the fermented carrots are below but if you are a visual learner, watch my Fermented Carrots video. In the video I’ll walk you through each step of the process with demonstrations and a detailed troubleshooting section. Otherwise, read on!

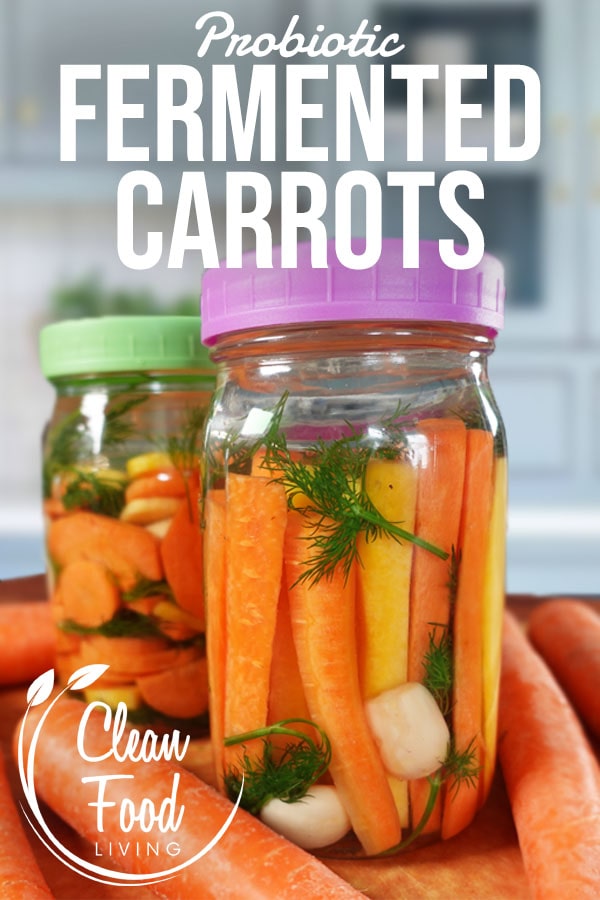
Section 1: Ingredients Needed For Fermenting Carrots
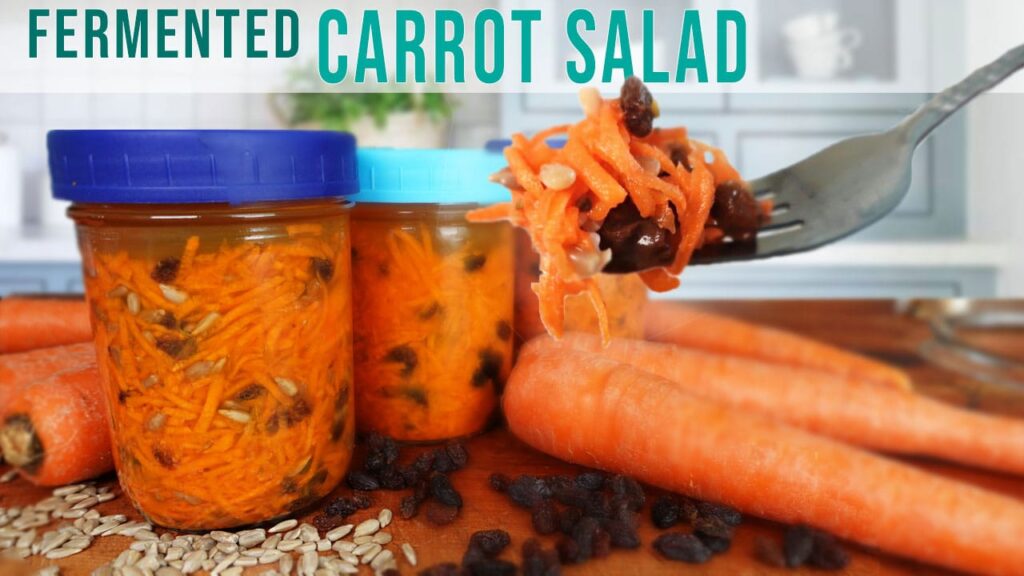
Carrots
Flavor: Carrots have a sweet and earthy flavor. During fermentation, this sweetness intensifies and transforms into a delightful tanginess.
Texture: Raw carrots are hard and crunchy but fermentation slightly softens their texture while still maintaining a good crunch.
Color: Although carrots are typically orange, there are also other color varieties such as purple, red, yellow, and white. The fermentation process may slightly alter the color, but the nutritional benefits are still strong.
Dill
Flavor: Dill has a fresh, herbaceous flavor with hints of anise and citrus. It complements the sweetness of carrots and adds complexity to the overall taste.
Texture: Fresh dill leaves are delicate and feathery, providing a light and herbaceous texture to the fermented carrots.
Color: Dill is green, contributing to the visual appeal of the fermented carrots.
Garlic
Flavor: Garlic imparts a pungent, savory flavor. During fermentation, it mellows, adding depth without overwhelming the other flavors.
Texture: Whole garlic cloves become softer during fermentation, and they can be enjoyed as a flavorful addition to the dish.
Color: The color of garlic remains generally the same, but it may take on a slightly translucent appearance.
Ginger
Flavor: Ginger has a spicy and slightly sweet flavor. Fermentation enhances its zesty notes, contributing a warm and aromatic quality to the carrots.
Texture: Fresh ginger slices are firm, and fermentation can soften them while maintaining a bit of bite.
Color: Ginger is tan or beige, and the slices may become more translucent during fermentation.
Saltwater Brine
The brine is a combination of salt and water. It acts as a preservative and it also encourages the growth of beneficial bacteria responsible for fermentation. Additionally it creates a hostile environment for harmful bacteria and pathogens.
Type of Salt
Avoid using a salt that contains anti-caking additives because they can interfere with the fermentation process. To know if your salt contains them, read the ingredients on the salt package. Any salt will work with fermentation so long as the ingredients read salt and only salt.

Section 3: Fermented Carrots Instructions
1. Prepare a Clean Jar: Begin by washing a quart or liter-sized glass jar thoroughly in hot soapy water and rinse well. Hot soapy water is sufficient, sterilization is not required.
2. Peel and Cut Carrots: Peel the carrots to remove the tough and bitter skin. Then, cut them into sticks that will fit easily into the jar, leaving some headspace for the fermenting weight and brine.
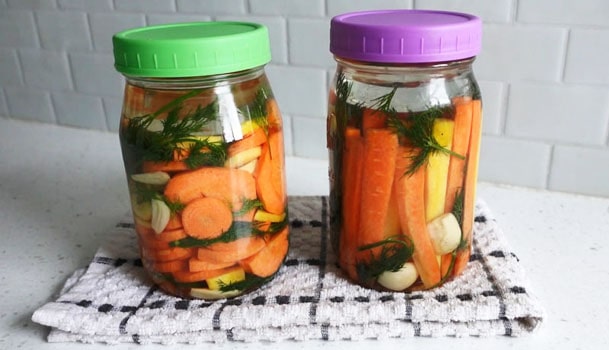
3. Load the Jar: Pack the carrot sticks into the jar tightly as to minimize gaps. Tilting the jar on its side as the carrots are inserted is very helpful.
4. Add The Other Ingredients: Intermittently add the fresh dill and garlic cloves as the carrots are loaded into the jar. Ginger slices are also a tasteful addition! Feel free to omit anything you either don’t have available or dislike.

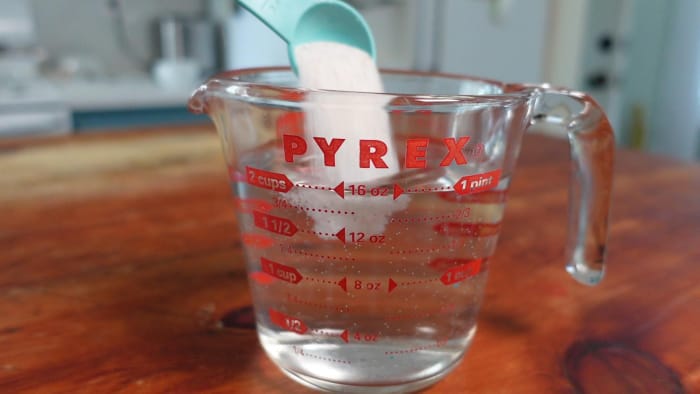
5. Prepare Brine: In a separate container, mix 1 tablespoon of fine salt with 1.5 cups of water OR Add 16 grams salt of any size grain size to 350ml of water and mix thoroughly. This is enough brine for 1 quart/liter jar.
6. Pour Brine: Pour the prepared brine over the carrots, ensuring everything is fully submerged.
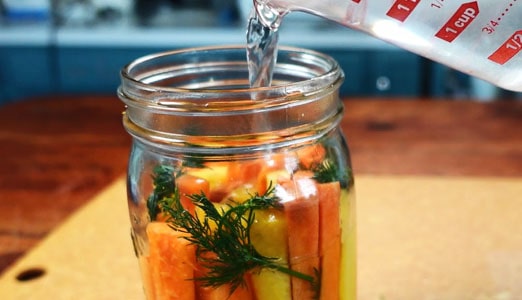
7. Use a Weight: Before use, wash the fermenting weight in hot soapy water as you did the jar. Then place the weight on top of the carrots to keep them submerged below the brine. This is essential to prevent mold and spoilage.
8. Cover the Jar: Place a loose lid on the jar. So long as the lid is loose the fermentation gasses will be able to escape and you will not need to burp the jar. Optionally you can use a specialty fermenting lid however it is not required.
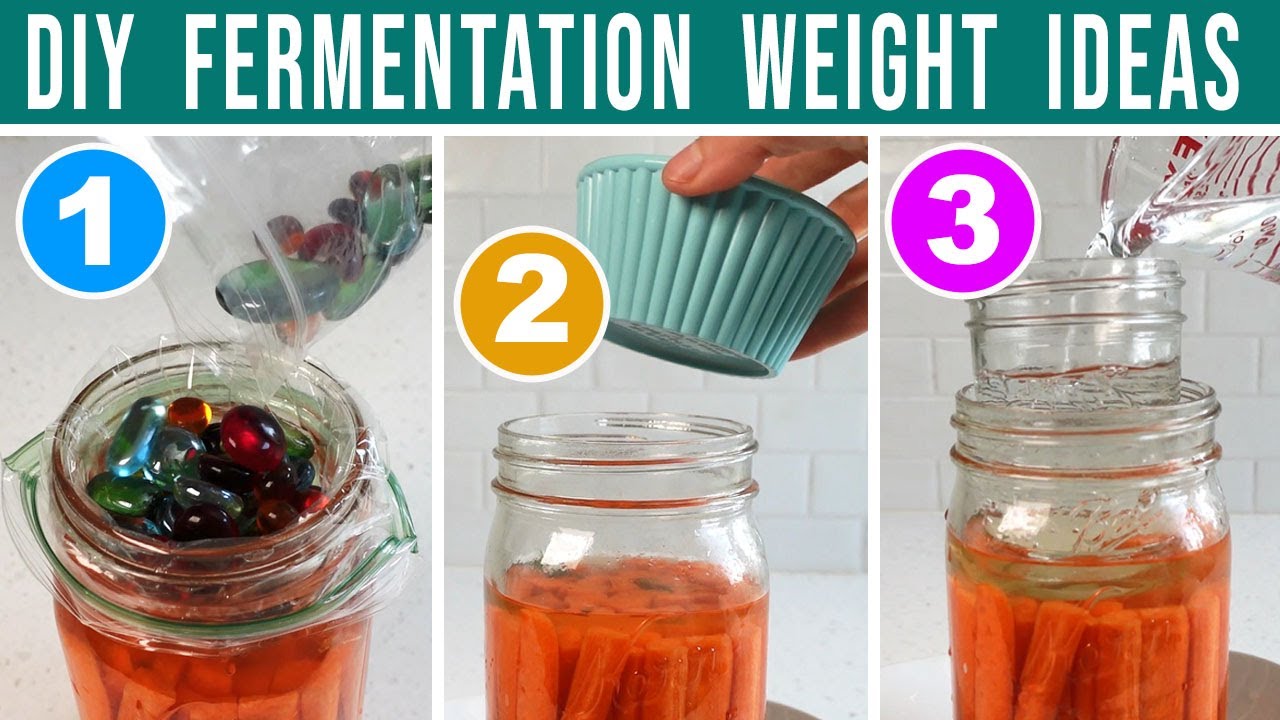
Notes About The Fermenting Weight
When fermenting foods it’s essential that the food remains submerged beneath the brine. These are the glass fermentation weights I recommend and personally use. They are lead free and heavier than other glass fermenting weights I have used in the past.

If you do not have glass fermenting weights, watch my YouTube video on DIY Fermentation Weight Ideas.
Section 4: The Fermentation Period
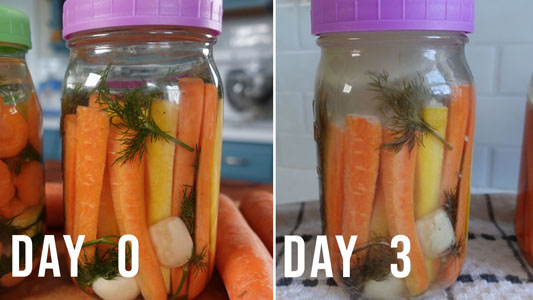
Leave the jar on the counter at room temperature for a fermentation period of 10 to 21 days. I recommend setting the jars on a kitchen towel to catch any possible brine overflow during the fermentation process.
What To Expect During Fermentation
The following are normal occurrences during the fermentation process and should not cause worry.
Color & Brine: You’ll notice the the color of the ingredients will change from vibrant to muted tones. The brine will become cloudy.
Bubbles: During the first week of fermentation, bubbles will appear. These are not oxygen bubbles, but rather carbon dioxide bubbles. Carbon dioxide is a byproduct of the good microbes and indicates they’re busy doing their job inside the jar.
Floaters: Sometimes the bubbles can push things up. Check for any pieces of carrot sticks or other ingredients floating above the brine. Either push back down or remove any floaters with a clean spoon to prevent mold.
PH Levels: Although PH testing is not required, it can help provide assurance that the carrots are fermenting successfully.
- To fully understand how to test the PH of fermenting foods, please watch my Fermented Carrots video of these instructions where I go into further detail and demonstration.
Smell and Sight: A healthy fermentation will have a light, sour-sweet smell. Carrots that are spoiling instead of successfully fermenting will have a foul or offensive odor. If any signs of mold begin to develop, remove it immediately with a clean utensil.
Kahm Yeast: Foods high in natural sugars such as carrots are prone to develop kahm yeast. This is a wild yeast that is naturally present in the air and settles on the surface of a fermentation.
- Although kahm yeast is ugly, it is harmless. Watch my Kahm Yeast video on YouTube or read my Kahm Yeast Article on this website where I do a deep dive into the topic along with visual examples.
Section 5: Ending the Fermentation
Taste the fermented carrots anywhere between 10 and 21 days. Do they taste delicious? Is the texture enjoyable? The longer the carrots ferment, the more their flavor will develop, sourness will increase and their texture will also continue to soften.
When they reach your preferred level of flavor, sourness and tenderness, it’s time to transfer them to the refrigerator for long-term storage. Here’s how to do it:
- Remove The Lid: Open the jar and take a look. Most likely you’ll see a layer of kahm yeast on top. This is okay.
- Remove The Weight: With clean hands, reach in through the kahm yeast and remove the fermenting weight. Use a paper towel as a gripper if the weight is too slick. The good news is that the fermenting weight will take the bulk of the kahm yeast out with it.
- Remove The Kahm Yeast: Next, use a paper towel to wipe off the remaining kahm yeast from the inside of the jar. You can also dab the surface to pick up remaining kahm yeast flakes. Remember that kahm yeast is harmless, so if some pieces remain, it’s ok!
- Storage: Place a regular tight lid on the jar. Then transfer to the refrigerator where they will last many months.
In my Fermented Carrots video, I provide a demonstration on how to remove kahm yeast.
Is My Fermentation Safe To Eat?
This is the #1 question from fermenting newbies and is an important topic to cover. Below are the 4 safety check points to follow to ensure your fermented food is safe to eat.
- Sight: When you open the jar, inspect the onions for any mold. If there is none, move on to the next check point.
- Smell: Put your nose up the the jar and take a whiff. A healthy fermentation should have a light soury-sweet smell, never foul or offensive.
- PH: Take a PH reading with either a digital meter or paper test strips. A safe fermentation has a PH below 4.5.
- Taste: If the above points all pass, it’s time to take a taste! The onions should taste pleasant (even delicious) and never foul or rotten.
Click here to view or print my 4-point checklist:

Summing Up…
Fermented carrots offer a delightful, low calorie way to introduce probiotics into your diet. Give this easy fermented carrot recipe a try. Experiment with different herbal flavors and enjoy the health benefits of probiotics along the way!
Inspired to to make more fermented vegetable creations? Check out my Sauerkraut Masterclass and my Fermented Onions recipe. Both are beginner friendly and walk you though step-by-step!
Fermented Carrots
Equipment
- 1 Quart or Liter Jar Wide mouth
- 1 Glass Fermenting Weight If you don't have a glass fermenting weight, watch my video on DIY alternatives provided on my website or YouTube channel.
- 1 Jar Lid A regular lid will work. Optionally, you can use a specialty fermenting lid.
Ingredients
- Carrots Sticks or slices, enough to fill the jar
- 1 handful Dill Fresh
- 3-4 cloves Garlic Peeled and whole
- 3-5 slices Ginger Fresh, *optional
- 1 tbsp Salt Pure salt without anticaking agents
- 1½ cups Water
Instructions
Instructions
- Peel the carrots then cut them into sticks or round slices. Set aside.
- Optionally remove the dill stem then tear the dill into pieces. Set aside.
- Peel the garlic cloves. Set aside.
- Slice the ginger. Set aside.
Prepare The Brine
- Add 16 grams salt of any size grain size to 350ml of water and mix thoroughly. This is enough brine for 1 liter jar.OR Add 1 tablespoon fine grain salt to 1.5 cups water and mix thoroughly. This is enough brine for 1 quart jar.
Load The Jar
- IF MAKING CARROT STICKS: Cut the stick length to be approximately 75% the height of the jar. This height will also leave room for the fermentation weight & brine. Tilt the jar to the side with one hand while loading the carrot sticks with the other. The tilting makes loading the carrot sticks easier. Intermittently, add the garlic cloves, ginger slices and dill. A chopstick is a handy tool to help squeeze the garlic, ginger and dill into the tight spaces between the carrot sticks.
- IF MAKING CARROT SLICES: Add the carrot slices, dill, ginger & garlic in layers. Fill the jar approximately 75%. Squeeze the carrot slices into the gaps, the less gaps the better. A chopstick can be handy if the gap is low in the jar.
- Once the jar is about 75% full and no more sticks or slices will fit, pour the brine over the carrots.
- Use a mallet, chopstick or clean hands to press the carrots beneath the brine.
- Place the fermentation weight into the jar on top of the carrots. Press it down to ensure it is fully submerged beneath the brine. Add any remaining brine to top off the jar. If you are a smidge short on brine to fully cover the weight, make a smidge more by adding 1-2 grams of salt to 20g salt (or ⅛ tsp of fine grain salt to 2 tbsp of water). Mix and add to the jar.
- Inspect the surface for any floating pieces of food and remove them. Floaters that are exposed to the surface oxygen are subject to possible mold development.
- Place a loose lid on the jar. So long as the lid is loose, the fermenting gasses will be able to escape and you will not need to burp the jar.Optionally a specialty fermenting lid can be use, but is not required.
- Set the jar on a towel or plate to catch any possible brine overflow that will occur during the first week of fermentation.
Fermentation Period
- Allow the carrots to ferment on the counter at room temperature (70-85°F / 21-29°C) for a minimum of 10 days up to 3 weeks.
What To Expect
- Colors will change from vibrant to muted tones.Carbon dioxide bubbles will form during the 1st week of fermentation, then die off during week 2 and 3.A healthy fermentation should have a light soury-sweet smell. If the fermentation smells offensive or rotten, throw it away.Kahm Yeast will most likely develop on the surface. Although unattractive, it is harmless. Watch my Kahm Yeast video on YouTube or read my Kahm Yeast Article at CleanFoodLiving.net where I do a deep dive into the topic along with visual examples.
End The Fermentation
- When you decide to end the fermentation period (a minimum of 10 days up to 21 days) is based on your taste preference. The longer the carrots ferment, the more their flavors will develop and their texture will slightly soften (yet still be crunchy).
- Open the jar and take a look. Most likely you’ll see a layer of kahm yeast on top. This is okay. With clean hands, reach in through the kahm yeast and remove the fermenting weight. Use a paper towel as a gripper if the weight is too slick.
- Remove any remaining kahm yeast. The good news is that the fermenting weight will take the bulk of the kahm yeast out with it. Next, use a paper towel to wipe off the remaining kahm yeast from the inside of the jar. You can also dab the surface with a paper towel (or use a spoon) to pick up remaining kahm yeast flakes. Remember that kahm yeast is harmless so if some pieces remain, it’s ok! *Demonstration of how to do this is provided in the video.
- To store long term, keep the weight out of the jar and put the lid back on tightly.Place the fermented carrots in the refrigerator where they will last for many months.
Video
Notes
- A longer fermentation will produce a more tart/sour flavor and the carrots will become more tender. Additionally, a greater probiotic-nutrient density will develop. The lactobacillus bacteria will begin producing vitamins, enzymes and polyphenols as the fermentation matures between days 14 through 21.
- A shorter fermentation (8-10 days) will still have a tart/sour flavor, but perhaps less intense. The carrots will be firmer as well. They will still have a probiotic profile and be nutritious, just not to the level of a more mature fermentation.
- There is no virtue in feeling you ‘have-to’ let them ferment longer if you don’t like their flavor and texture at that stage. Enjoy the carrots to your preference!
- For more detailed instructions and notes, please watch the YouTube Video.
Citations
- WebMD. (n.d.). Carrots: Health benefits, nutrients, and more. WebMD. https://www.webmd.com/diet/health-benefits-carrots
- Norris, T. (2018, September 29). Probiotics and digestive health: Benefits, risks, and more. Healthline. https://www.healthline.com/health/probiotics-and-digestive-health