This “How To Make Sauerkraut” Recipe post contains affiliate links. Please read my affiliate disclosure.
How to Make Sauerkraut: A Probiotic-Rich Delight
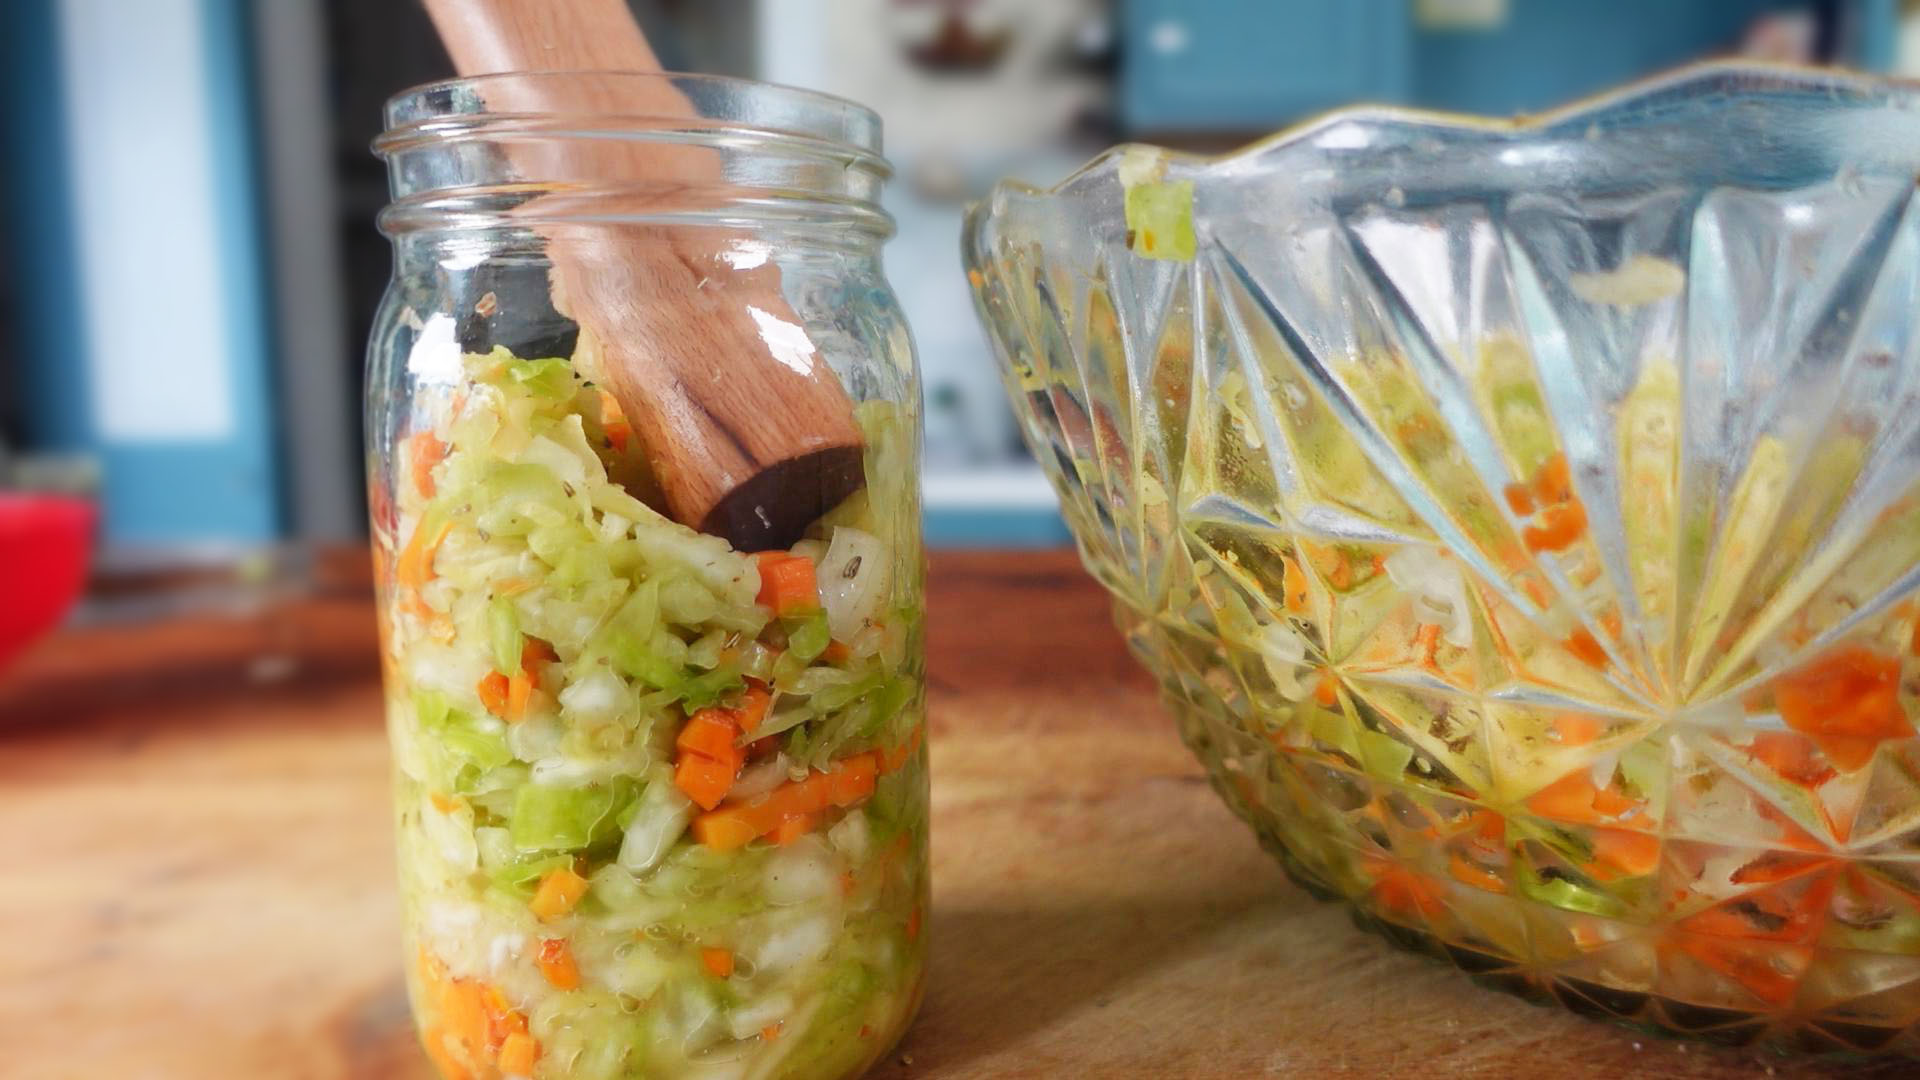
Sauerkraut is a delicious and versatile fermented food that has been enjoyed for centuries. Whether you’re a beginner or a seasoned fermenter, this comprehensive guide will take you through the step-by-step process of how to make sauerkraut at home.
I’ll help you select the perfect cabbage, put the ingredients together, inform you on what to expect during fermentation and how to store the sauerkraut long-term.
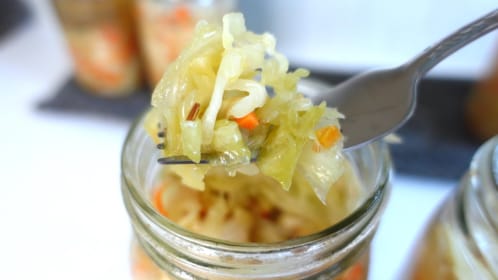
This sauerkraut recipe is not only delicious & tangy, but probiotic-rich and it will leave you craving more!
The Health Benefits of Sauerkraut
Beyond its mouthwatering taste, sauerkraut offers numerous health benefits. As a natural source of probiotics, it promotes a healthy gut microbiome and aids digestion.1 Sauerkraut is also rich in vitamins C and K, as well as antioxidants, which support overall immune health. 2
So, what are you waiting for? Embrace the art of sauerkraut-making and unlock a world of flavor and wellness and get ready to enjoy this tangy, crunchy, and probiotic-rich delight!
Make Sauerkraut Along With Me
If you are a visual learner, my Sauerkraut Masterclass video below is the accompaniment of this article on steroids! I provide clear visual step by step demonstrations so that you can feel confident creating your first sauerkraut right along with me.
You can watch the video here on this page by clicking the image below or on YouTube.
Section 1: Select the Ideal Cabbage
The first step in creating your sauerkraut masterpiece is choosing the right cabbage. While this sauerkraut recipe is based on a 4-pound (2 kg) cabbage, you can adjust the quantity of how much or little sauerkraut (with its ingredient additions) you’d like to make based on the cabbage size.
Source The Cabbage
Whether you source your cabbage from your garden, farmers market, or a commercial grocery store, cabbage is known for its reliability in the fermentation process. Unlike some other vegetables, cabbage can withstand various processing methods and still ferment successfully.
To Wash or Not To Wash
When it comes to preparing the cabbage, there’s no need to wash it unless it’s visibly dirty or has bugs. The outer leaves will be removed anyway during the sauerkraut-making process and the inner leaves are typically free from any contaminants, dirt or bugs. However, if you need to clean your cabbage, a quick rinse with tap water will suffice.
Section 2: Prepare the Cabbage for Making Sauerkraut
Now that you’ve selected your cabbage, it’s time to prepare it for fermentation.
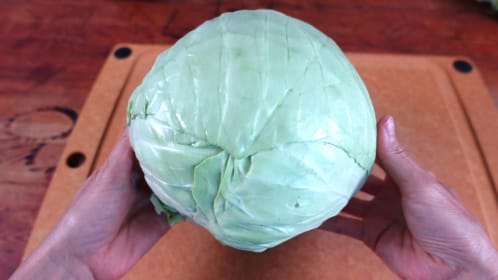
The Outer Leaves
Start by removing the outer leaves and discard the imperfect leaves. Afterwards the pristine inner leaves should be exposed as shown in the photo above.
Next peel off 2 to 3 more leaves of the good leaves and keep them intact the best you can. Set them aside for later use.
Cut & Slice
Quarter the cabbage then cut out the root base. I like to use the root bases in things like a vegetable stock or slice them up into a soup. You can do the same!
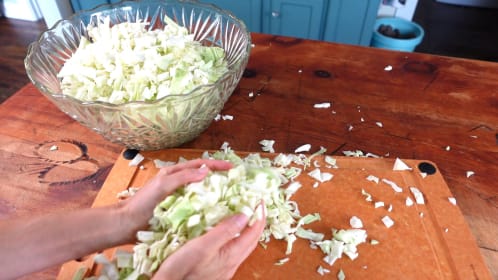
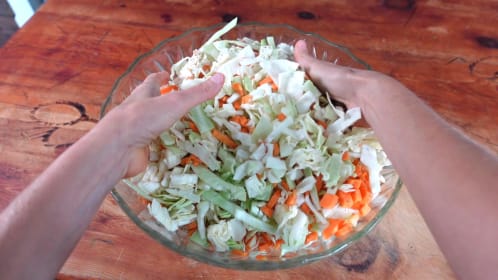
Next, slice or shred the cabbage using a sharp knife or food processor. You can adjust the thickness of the shreds to your liking, but keep in mind that thinner shreds tend to ferment faster and become softer. Aim for uniform shreds to ensure even fermentation.
Add the shredded/sliced cabbage to a large mixing bowl. A glass, stainless steel or plastic bowl will work. You don’t want to ferment in metal or plastic, but for mixing, any of those materials are just fine to use.
Section 3: Flavor and Enhancements
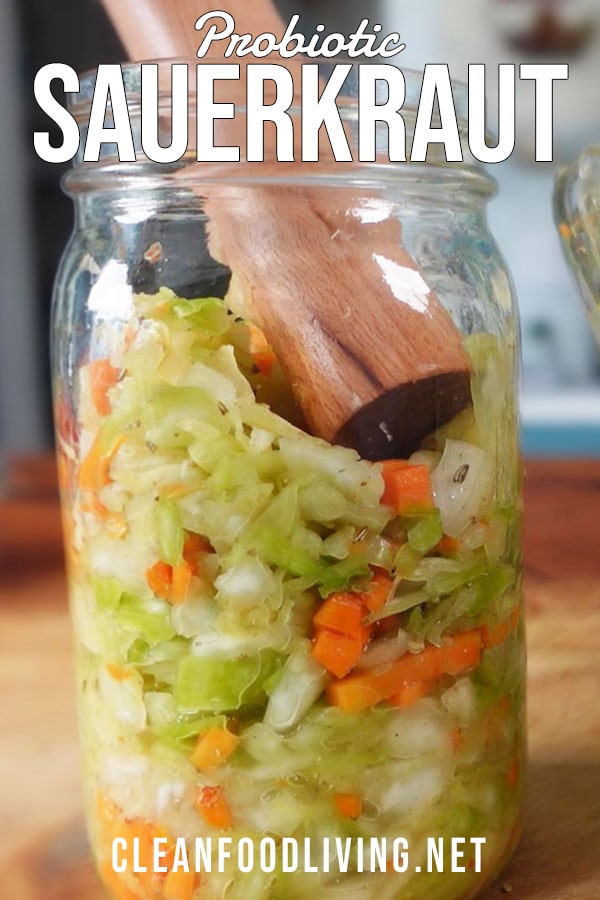
While traditional sauerkraut consists of just cabbage and salt, you can get creative and add various flavorings and enhancements to elevate your sauerkraut game. My signature sauerkraut recipe that I’m sharing with you today contains the following added ingredients:
Carrot: This sauerkraut recipe calls for about 2 cups or 250 grams of chopped carrot. (No need to be exact) I personally like to peel my carrots since the skins tend to have a bitter flavor to them. But if you want to keep the skins on, feel free to do so. Add to the bowl.
Fresh Ginger Root: Ginger root tastes absolutely amazing in this sauerkraut recipe! Peel and loosely chop approximately 1/3 cup or 50 grams of fresh ginger and add to the bowl. However, feel free to leave it out if you either don’t have it or don’t like it.
- Some people ask me if they can use fresh turmeric root instead. Yes you can, but keep in mind it will change the flavor of the sauerkraut. If you love the flavor of turmeric then you’re good to go. Personally I love the ginger.
Fennel Seeds: The last of the ingredients is 2 tbsp / 10 grams of fresh ground, whole fennel seeds. If fennel is not for you, substitute with either dill seeds or caraway seeds. Any of these seed spices are delicious in this sauerkraut recipe!
Pro-Tip
Fresh grinding the seeds in a little coffee bean or spice grinder is a game changer when it comes to flavor. The fresh grinding releases explosive flavor and bio-active nutrients such as polyphenols. However if pre-ground is all you have, it’s ok, go ahead and use it! This is the mini grinder I personally use.
Mix It Up
Add the ingredients to the cabbage in the mixing bowl and give mix with your clean hands. With future batches, feel free to experiment with other herbs, spices and vegetables to create unique flavor combinations. However, remember to maintain the primary focus on the cabbage and salt to ensure a successful fermentation.
Section 4: Salt the Cabbage
Salt plays a crucial role in the sauerkraut fermentation process. It creates an environment that promotes the growth of beneficial bacteria while inhibiting the growth of harmful ones.
This sauerkraut recipe uses a method called, dry salting which means the salt is added directly to the cabbage without added water. The salt “works” on the cabbage by drawing out water from within the cabbage leaves to create a natural, cabbage juice brine.
For a 4 to 4.5 pound (2 kg) cabbage, you’ll need approximately 2 tablespoons or 34 grams of fine grain salt.
Type of Salt
Avoid using a salt that contains anti-caking additives because they can interfere with the fermentation process. To know if your salt contains them, read the ingredients on the salt package. Any salt will work with fermentation so long as the ingredients read salt and only salt. These are my favorite fermenting salts.
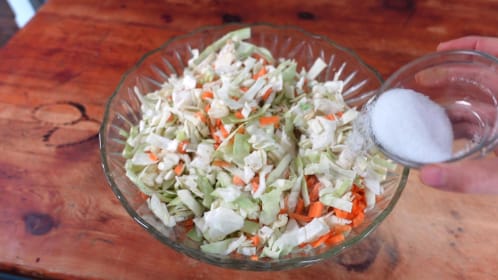
First: Evenly distribute the salt throughout the cabbage. I recommend mixing it in a little at a time as you layer the shredded cabbage in your fermentation vessel.
Second: Use your hands to massage the salt into the cabbage for a couple of minutes.
Cabbage Rest Period #1
After massaging, allow the cabbage to rest by leaving it be on the countertop for 30-60 minutes. The salt will begin to ‘work’ on the cabbage during this time.
Return to the cabbage after the 1st rest period and with freshly washed hands, massage the cabbage. You can also use a wooden dowel or a ‘kraut pounder’ if you prefer. I typically go back and forth from using my hands, to using the wooden dowel. I provide a demonstration of this process in the video.
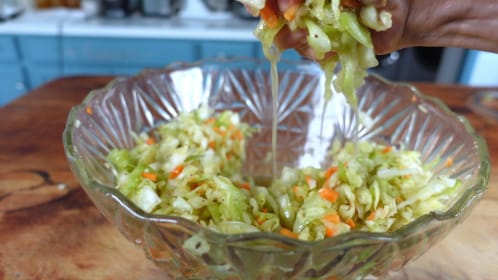
After massaging & pounding for about 15 minutes, you will notice that the cabbage has soften significantly. The cabbage should be wet and soft from its own juices while an accumulation of natural cabbage brine has formed at the bottom of the bowl. When you pick up a handful and squeeze, the cabbage should readily release juice.
Cabbage Rest Period #2
Allow it to rest for another 15 to 30 minutes. Afterwards, the cabbage is will be ready to load into the jars.
This is a good time to prepare the fermenting vessel(s) as explained in the following section.
Section 5: Fermentation Equipment For Making Sauerkraut
Thankfully making sauerkraut does not require fancy equipment. Here is a list of a few popular fermentation gear options:
Vessels
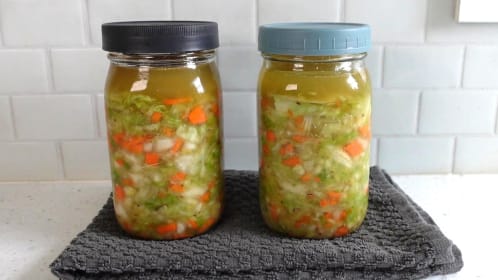
- Mason Jars: Mason jars are a convenient choice for small-batch fermentation. Opt for wide-mouth jars to make packing and retrieval easier. Today’s recipe will be using 2 wide mouth Mason jars.
- Fermentation Crocks: Traditionally crocks are made from stoneware such as ceramic. They are specifically designed for fermenting vegetables. They often come with weights to keep the cabbage submerged in its own brine.
- Fermentation crocks are available in many sizes from 1/2 gallon to 5 gallon. This is a great option for large batches of sauerkraut, but not required. Feel free to browse my hand-picked selection fermentation vessels for large batches here.
Weights
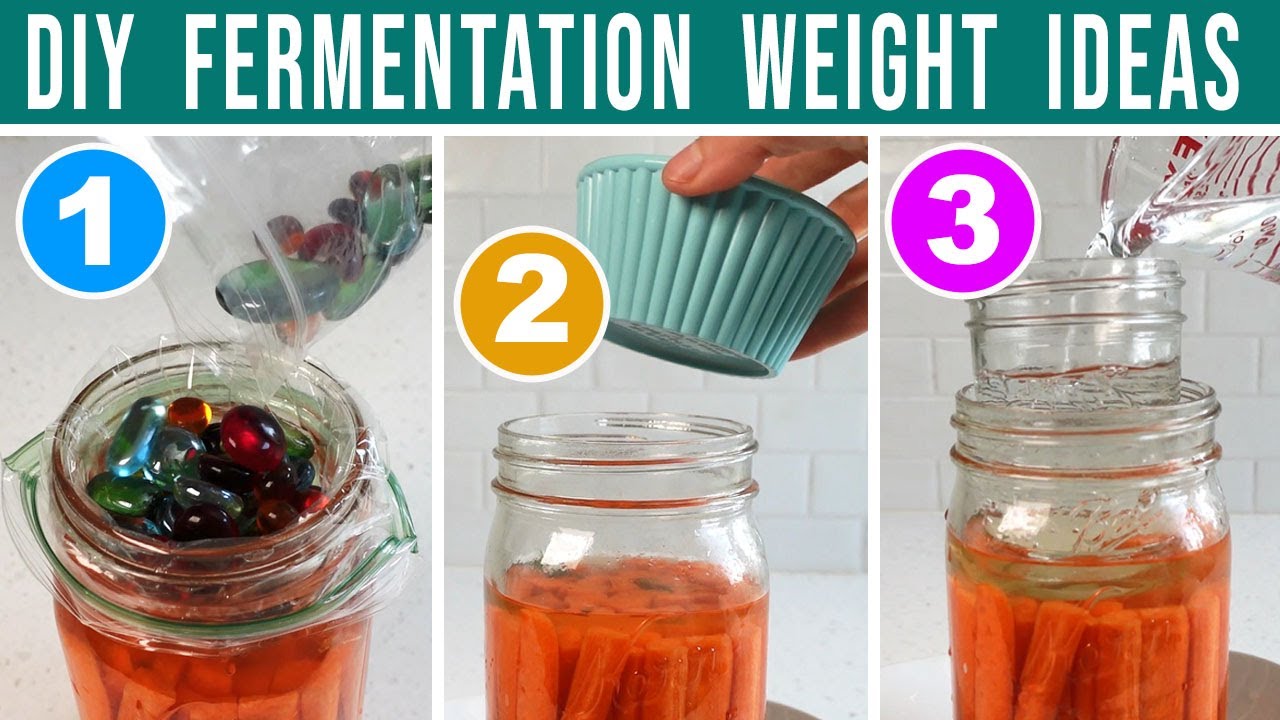
Fermentation weights are the second most important item to use when fermenting vegetables. Their job is to hold the cabbage and other ingredients beneath the brine which is imperative to prevent mold. I will discuss fermentation weights further along in this article so keep reading!
Lids
- Fermentation Lids: A regular jar lid will work well so there is no need to buy a specialty fermentation lid. However specialty lids can be nice to not only use with sauerkraut, but other fermented vegetable creations as well. They help to create an airtight seal, ensuring an ideal fermentation environment.
If you are interested in a specialty fermentation lid but aren’t sure which one to get, watch my video below where I compare the most common fermentation lids on the market and demonstrate their results.
You can also shop my favorite specialty lids here, but remember, they are not required. A regular lid will work just fine!

Washing The Equipment
Cleanliness is crucial to prevent the growth of harmful bacteria that could spoil your sauerkraut. Therefore, whichever vessel, weight and lid you choose, ensure that it’s washed thoroughly with hot soapy water before use.
Sanitization is not required, hot soapy water is sufficient. If the extra steps of sanitization provides you with additional peace of mind, feel free to do so. Just keep in mind it’s not required.
Section 6: Pack the Fermentation Vessel
Now that your cabbage is prepped and your fermentation vessel is ready, it’s time to pack the cabbage tightly into the vessel. The goal is to eliminate air pockets and ensure that the cabbage is fully submerged in its own brine.
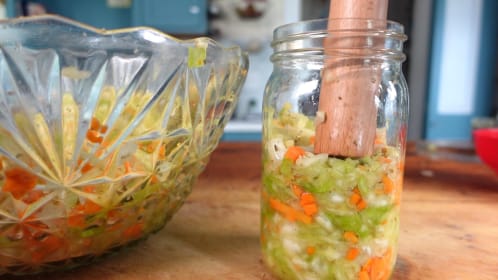
- Take a handful of the salted cabbage and drop it into the jar. Then press it down firmly into the vessel. Use the wooden dowel or your fist to compact it.
- Continue this pattern of adding & pressing one to two handfuls at a time. The cabbage should release enough liquid throughout the process to cover the cabbage entirely.
Cabbage Leaf Topper
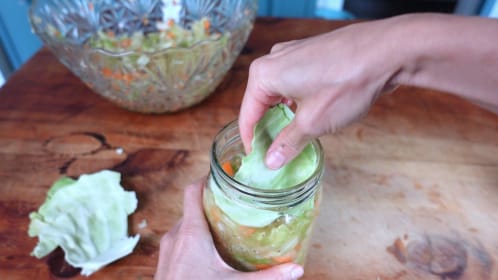
Once you’ve added enough cabbage to fill the jars about 75-80%, you are now going to use the cabbage leaves that were set aside from earlier. The purpose of the leaves is to make a cabbage leaf topper for this sauerkraut recipe.
The topper is important because it’s going to help hold everything down beneath the brine during the fermentation period. Plus it helps protect the kraut during long term storage if you don’t plan on eating it right away.
- Tear off a piece that you’ll be able to fit into the jar. Then tear off another piece and fit it in on top of the other.
- Use the friction of the cabbage leaf against the side of the jar to help create a secure hold.
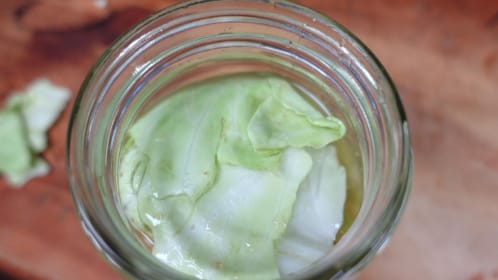
- Keep adding pieces until the topper forms complete coverage across the top surface and sides. It doesn’t have to be perfect because the glass weight is still going to be added.
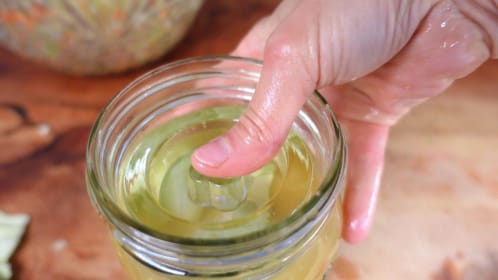
- After the topper is added, use your fist or mallet to give it one more firm press down to check brine levels. Make sure the brine comes up and over everything in the jar when you do.
- Pour any remaining brine over the top of each jar to ensure complete coverage. The cabbage should be fully submerged by the brine. This is important because exposure to air can lead to spoilage.
- Place a fermentation weight atop everything to help keep the cabbage below the brine level.
- Lastly, place a loose lid on the jar. So long as the lid is loose, the fermentation gasses can escape and you will not need to burp the jar. If using a specialty fermenting lid, follow the lid’s protocol for placement onto the jar.
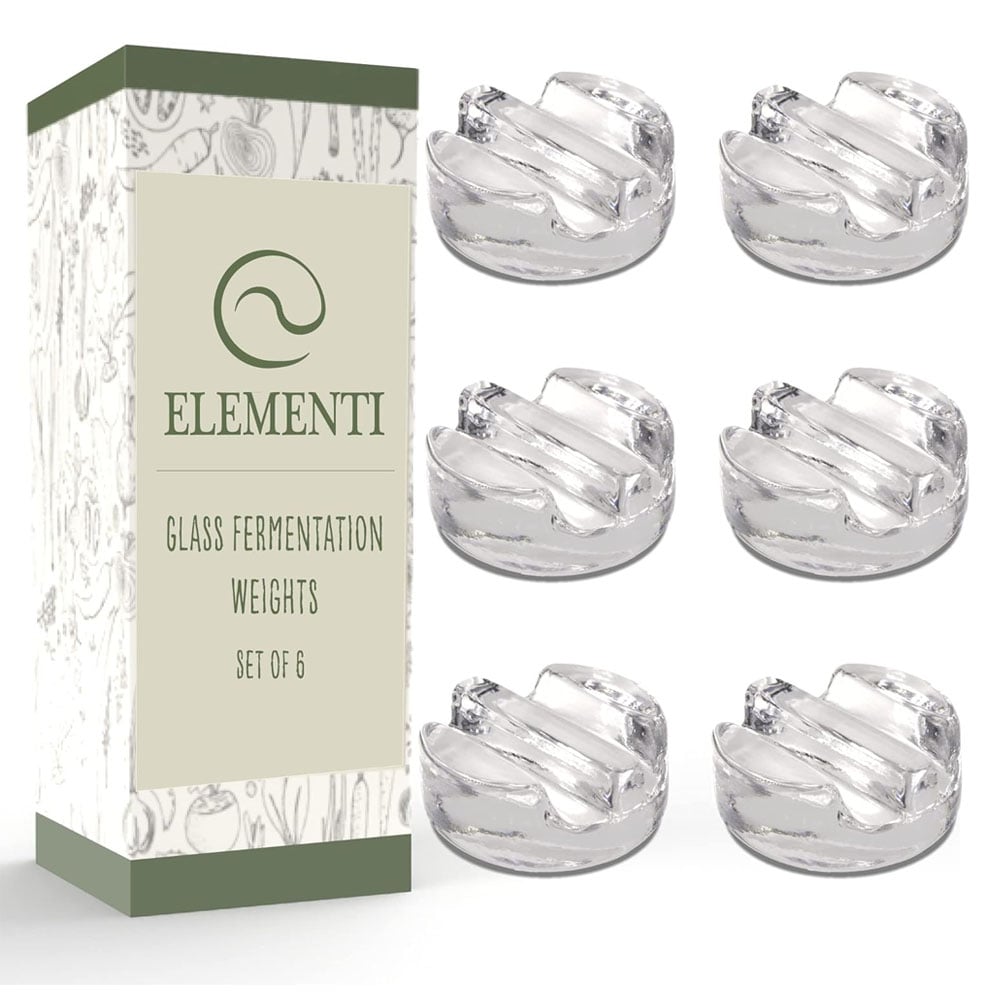
Notes About The Fermenting Weight
When fermenting foods it’s essential that the food remains submerged beneath the brine. These are the glass fermentation weights I recommend and personally use. They are lead free and heavier than other glass fermenting weights I have used in the past.
If you do not have glass fermenting weights, watch my video below on DIY Fermentation Weight Ideas.
Section 7: The Fermentation Process
With your vessel packed and the cabbage submerged and held down by a weight, it’s time to let the fermentation magic happen.
Allow the sauerkraut to ferment for 21 to 30 days. Find a suitable location for your sauerkraut to ferment. The fermentation should be placed somewhere out of direct sunlight although regular room light is okay. I leave mine on the kitchen countertop, but a pantry or cupboard would work as well.
The ideal temperature range for optimal fermentation is 70°F (21°C) to 85°F (29°C). I also recommend placing the jars on a towel to absorb and brine overflow that may occur during the 1st week of fermentation.
Section 8: Monitor The Fermentation
During the fermentation process, it’s essential to monitor your sauerkraut regularly. Here’s a week-by-week breakdown of what to expect and what to watch for based on this sauerkraut recipe:
Week 1: Bubbles & Color
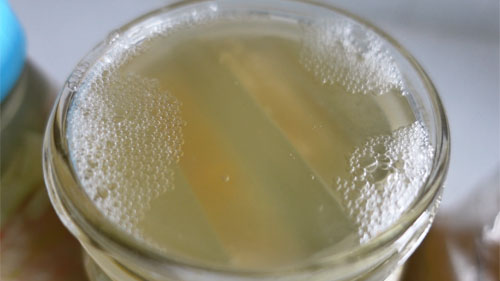
Within the first few days, you may notice some bubbling and foaming, which is a sign that fermentation is taking place. This is normal and indicates the presence of active microbes.
There’s no need to worry if there are not a lot of bubbles forming on the top since often times the bubbles are mingling within the cabbage. If you look closely, you’ll see them!
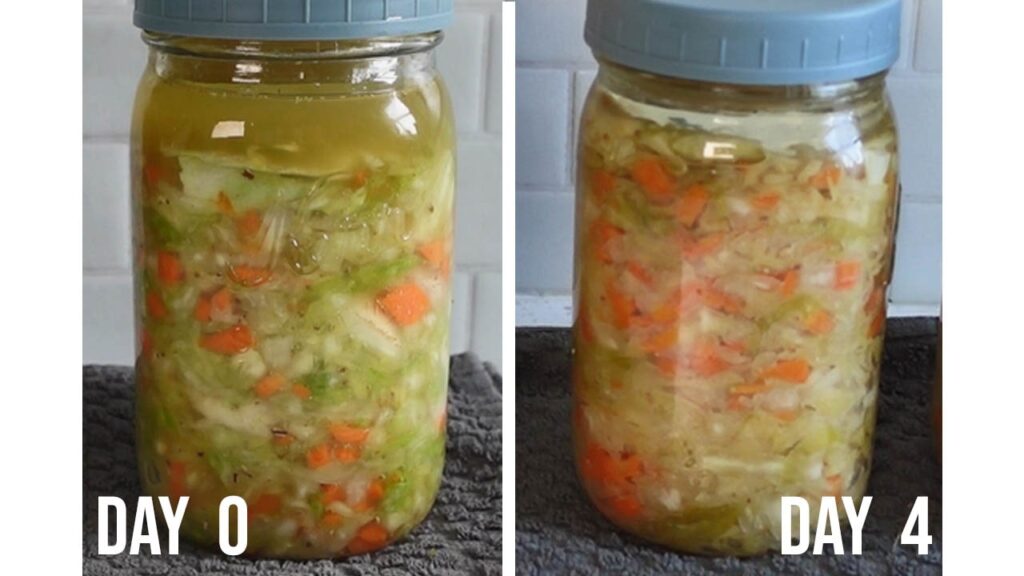
The color of the food ingredients will also begin to shift within the first 3 to 5 days. It will start off bright and vibrate and transition into muted, dull tones.
As the fermentation progresses, you may also notice a slight sour aroma. This indicates that the lactic acid bacteria responsible for the fermentation are producing the desired tangy flavor.
The brine may also darken and become cloudy. Again, these are normal signs of fermentation.
Week 2: Flavor Development
By the second week of the fermentation process, the bubbles will be nearly gone and the sauerkraut will develop its signature tangy taste.
If you prefer a milder sauerkraut, you can stop the fermentation process by days 10-14. There are plenty of healthy probiotics at this time so don’t have concerns that you are ending it too soon. I’ll discuss how to end a fermentation further along in this article.
If want this sauerkraut recipe to fully mature in flavor and probiotics, allow it to continue fermenting up to 3 or 4 weeks.
Week 3: Maturity
By the third week, the sauerkraut will reach full maturity. Maturity means the flavors will have intensified, the probiotics will be maximumly developed and the nutrients of the cabbage will be increased such as B-vitamins and enzymes.
At this stage, you can choose to end the fermentation or continue fermenting for a few more days to a week if you prefer a stronger sour flavor.
Section 9: End The Fermentation
Once your ready to end the active fermentation period of the sauerkraut, this is how you do it:
- With clean hands, remove the fermenting weight.
- Pull back the cabbage leaf topper and take a taste test with a clean utensil. Never double dip into the jar once the utensil is eaten from!

Is My Fermentation Safe To Eat?
This is the #1 question from fermenting newbies and is an important topic to cover. Below are the 4 safety check points to follow to ensure your fermented food is safe to eat.
- Sight: When you open the jar, inspect the onions for any mold. If there is none, move on to the next check point.
- Smell: Put your nose up the the jar and take a whiff. A healthy fermentation should have a light soury-sweet smell, never foul or offensive.
- PH: Take a PH reading with either a digital meter or paper test strips. A safe fermentation has a PH below 4.5.
- Taste: If the above points all pass, it’s time to take a taste! The onions should taste pleasant (even delicious) and never foul or rotten.
Click here to view or print my 4-point checklist:

Section 10: Long Term Storage
To store the sauerkraut long term, do not return the weight to the jar. Place a regular tight lid on the jar and store in the refrigerator. If you used a large fermentation crock, transfer the sauerkraut to clean jars and place in the refrigerator. However, if your crock fits in the fridge then there is no need to transfer the sauerkraut to jars.
In the olden days, fermentations were stored long term in a root cellar that had a temperature below 50°F (>10°C). These days most people do not have a root cellar (nor a basement that is cold enough). That is why a refrigerator is needed in modern times.
Storage Notes
- If everything was done correctly, the sauerkraut can last 1 to 2 years properly stored in the refrigerator.
- If you plan on eating the sauerkraut starting now, you don’t have to keep the cabbage leaf topper on. You can take it out and eat it!
- If you plan on storing the sauerkraut for some time before getting to it, that’s where I recommend keeping the topper on. I have found it to help preserve and protect the sauerkraut below until the jar is opened at a later time.
- The fermentation must be stored below 50 degrees, preferably between 38 and 45 in order to last a long time.
- Unfortunately if you live in a hot climate being warmer than 90° F (°32 C), perhaps with added humidity and without a refrigerator, your sauerkraut will not be able to last long term and will run its course within a few weeks. Without cold storage, long term storage isn’t possible. I’m sorry for the bad news!
Section 11: Enjoy Your Sauerkraut
Congratulations! You have successfully made your own sauerkraut. Now, it’s time to savor the fruits of your labor. Here are some ideas for enjoying your homemade sauerkraut:
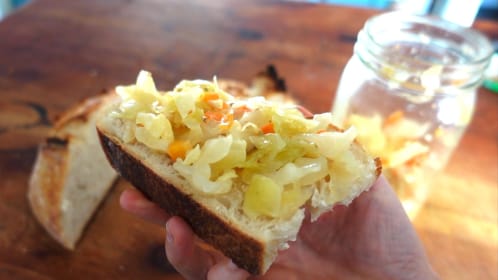
- As a Topping: Add sauerkraut as a tangy topping to hot dogs, burgers, sandwiches, or even tacos for an extra burst of flavor. My personal favorite is an open face sauerkraut sandwich on homemade sourdough bread!
- In Salads: Mix this sauerkraut recipe into salads for a crunchy and tangy addition. It pairs particularly well with hearty greens and creamy dressings.
- As a Side Dish: Serve sauerkraut as a side dish alongside roasted meats, sausages, or grilled vegetables. Its bright acidity cuts through rich flavors beautifully.
- In Fermented Veggie Bowls: Create a vibrant and probiotic-rich bowl by combining sauerkraut with other fermented vegetables, grains, and proteins.
Section 12: Troubleshoot Common Issues
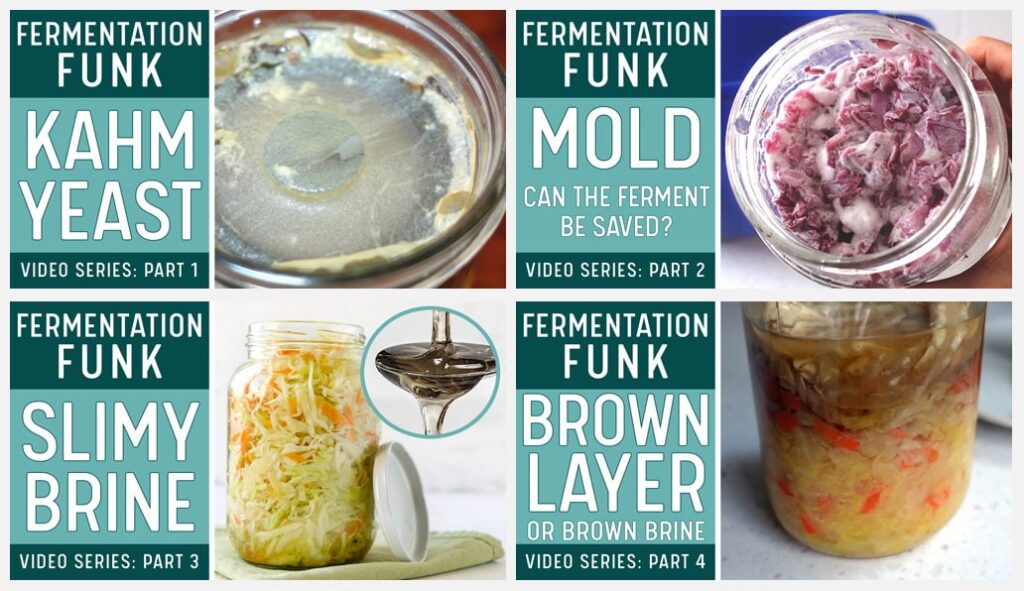
While making this sauerkraut recipe is a relatively straightforward process, you may encounter a few hiccups along the way. That is why I provide an abundance of resources to help!
On my YouTube channel Clean Food Living, I provide videos that go in detail about the most common fermentation questions such as mold, kahm yeast, slimy brine and brown layers that may form. Click here to view the video playlist.

How To Make Sauerkraut
Equipment
- Quart / Liter Jars wide mouth
- Glass Fermentation Weights alternative weights are okay to use
- Lid A regular lid will work. Optionally you can use a specialty fermenting lid.
- Wooden Dowel optional
- Canning Funnel optional
- Spice Grinder optional
Ingredients
- 4-4.5 lb. Cabbage Sliced
- 2 c Carrots Chopped
- ⅓ c Ginger Root Peeled and chopped
- 2 tbsp Whole Fennel Seeds Freshly ground. Sub with dill seeds or caraway seeds.
- 2 tbsp Salt Pure salt without anticaking agents.
Instructions
The Cabbage
- Unless the cabbage has dirt on it, there is no need to wash the cabbage because the outer leaves are being removed. Inspect the cabbage and remove any imperfect leaves. The inner leaves are typically pristine after a few of the outer leaves are removed.
- After the scrubby outer leaves are removed, next remove 2 to 3 of the newly exposed good condition leaves. Keep these leaves in tact the best you can and set aside for later use.
- Quarter the cabbage and cut out the stem portion.
- Slice the cabbage with a sharp knife or in a food processor. A medium to thick slice is best.
- Add all the shredded cabbage to a large mixing bowl.
The Other Ingredients
- Peel and chop the carrot and add to the mixing bowl.
- Peel and chop the fresh ginger root and add to the mixing bowl.
- Grind the spice seeds in a spice/seed grinder or a coffee bean grinder (completely cleaned out of course!) Then sprinkle over the ingredients in the mixing bowl.
- With your clean hands, give the vegetable mixture a light mixing as to incorporate everything.
The Salt
- Sprinkle the salt over the vegetable mixture a little at a time. In between each sprinkle, move the ingredients around as to fully incorporate the salt from top to bottom.
- Allow the cabbage/vegetable mixture to rest for 30 to 60 minutes. During this time the salt will begin working on the cabbage by drawing out natural juices as well as softening the cabbage.
Tenderize the Cabbage
- After the first rest period is complete, use your freshly washed hand to firmly massage the cabbage. Additionally, you may use a wooden dowel to pound the cabbage. Or, switch back and forth using hands and dowel. Work the cabbage for 15-20 minutes. If you would like visual understanding of how to massage & pound the cabbage, watch the video where I provide a demonstration.
- After working the cabbage by massaging and/or pounding, it should be very tender and juicy. An accumulation of natural juices will be at the bottom of the bowl and when you pick up & squeeze a handful of the mixture, ample juice will release.Allow the cabbage to rest a second time for 15 to 30 minutes. After this second rest period, the cabbage will be loaded into the jars. Optionally, a large fermenting crock may be used in place of jars.
- If little to no juice has released from the cabbage, then you have a "dry cabbage" meaning it does not have sufficient hydration for the salt to draw from. See the alternate "Dry Cabbage" instructions below to know what to do.
Alternate Instructions For A Dry Cabbage
- Skip these alternate instructions if your cabbage became nice & juicy after the 1st resting period accompanied by massaging and pounding.However if you're cabbage is lacking natural juice formation, follow these alternate instructions to create a handmade brine.First, you won't know you have a dry cabbage until after the 1st rest period when it's become obvious that little to no juice has formed. Additionally, the cabbage will still feel stiff and will resist softening when massaged or pounded.Since the needed amount of salt is already added, simply pour 3 cups (700 ml) water over the cabbage mixture in the bowl. Lightly toss the mixture around as have everything coated by the water.
- Allow the cabbage to rest in the salty water for 15 to 30 minutes.
- When you feel the cabbage after the second rest period, you will notice that it still has firmness to it. This is normal for a dry cabbage.
- Load the jars in the exact same manner as given in the next group of instructions.Be aware that due to the firmness of the 'dry cabbage', it will not pack down as tightly as the natural-brine cabbage. Therefore an extra jar will most likely be needed.
Load the Jars
- Prepare the jars and fermenting weight by washing them with hot soapy water. Sterilization is not required, hot & soapy water is sufficient.
- Take 2 large handfuls of the cabbage mixture and drop it into the jar. A canning funnel is very helpful with this step because it prevents the cabbage mixture from spilling out during the loading process. However, it is not required.
- With either your fist or a dowel, firmly press the mixture down as to push out any air pockets.
- With each handful of cabbage mixture, make sure it is nice & juicy by grabbing the wet stuff toward the bottom of the mixing bowl.If you are working with a 'dry cabbage', add a small scoop or two of the handmade brine and add to the jar.
- Repeat this process of loading and packing until the jar is 75-80% full.
Cabbage Leaf Topper
- It is time to make the cabbage leaf topper. With the cabbage leaves set aside from earlier, tear off pieces of the leaves to fit into the jar overtop the sauerkraut. Use the friction of the leaf piece against the glass to create a secure hold. The cabbage leaf topper will help hold the sauerkraut beneath the brine during the fermentation period. It also helps protect the finished sauerkraut during long term storage.Use several pieces of the leaves to completely cover the top of the sauerkraut. It doesn't have to be perfect since a glass fermenting weight will be used next.If you would like to see a demonstration of how to create the cabbage leaf topper, watch the video at the 9min,15sec time stamp where I provide a visual example.
- Load the 2nd jar exactly in the same way including the cabbage leaf topper.
- Evenly distribute any remaining juice/brine from the bottom of the mixing bowl by pouring it over the sauerkraut in both jars.
- Add the fermenting weight to each jar and press it down. The brine should either cover the weight completely or by at least 80%.
- If you find yourself significantly short on natural brine do this: Add 1½ teaspoon of fine salt to 1 cup of water or 10g salt to 250ml water. Mix thoroughly then pour the additional handmade brine into the jars that need it.
- Place a loose, regular lid on the jar. So long as the lid is loose and not tight, the fermentation gasses will be able to escape and you will not need to burp the jar during the fermentation period.Alternatively, you can use a specialty fermenting lid but it is not required.
The Fermentation Period
- Place the jars of sauerkraut on a dish towel and leave on the counter for 21 to 30 days. The dish towel under the jars will catch any possible brine overflow that may occur during the 1st week of the the fermentation period.
- The ideal environmental temperature between 70-85°F (21-29°C). This is an optimal range that will allow the sauerkraut to ferment at a nice pace, not too fast and not too slow. Note: The cooler the environmental temperature is, the slower the fermentation will take place. The warmer the environmental temperature is, the faster the fermentation will take place.
What To Expect
- Colors will change from vibrant to muted.Carbon dioxide bubbles will form during the 1st week of fermentation, then die off during week 2 and 3.A healthy fermentation should have a light soury-sweet smell with hints of sulfur due to cabbage being high in sulfur compounds. If the fermentation smells offensive or rotten, throw it away.
Ending The Fermentation
- By the third week, the sauerkraut will have reached its desired level of fermentation. The flavors will have intensified, the probiotics will be maximumly developed and the nutrients of the ferment will be increased such as B-vitamins and enzymes. At this stage, you can choose to end the fermentation or continue fermenting for another week if you prefer a stronger sour flavor.
- With clean hands, remove the fermenting weight.
- With a clean utensil, pull back the cabbage leaf topper. Then take out a bite to taste test! Be sure not to double dip if you eat from the utensil.
- To store the sauerkraut long term, do not return the weight to the jar. Place a tight lid on the jar and store in the refrigerator. If everything was done correctly, the sauerkraut can last 1 to 2 years properly stored in the refrigerator.
- If you plan on eating the sauerkraut starting now, you don’t have to keep the cabbage leaf topper on. You can take it out and eat it! If you plan on storing the sauerkraut for some time before getting to it, keep the topper on because it will help preserve and protect the sauerkraut below until the jar is opened later.
Video
Notes
CITATIONS:
<1> Norris, T. (2018, September 29). Probiotics and digestive health: Benefits, risks, and more. Healthline. https://www.healthline.com/health/probiotics-and-digestive-health
<2> Raak, C., Ostermann, T., Boehm, K., & Molsberger, F. (2014, November). Regular consumption of sauerkraut and its effect on human health: A Bibliometric analysis. Global advances in health and medicine. https://www.ncbi.nlm.nih.gov/pmc/articles/PMC4268643/
More Recipes …
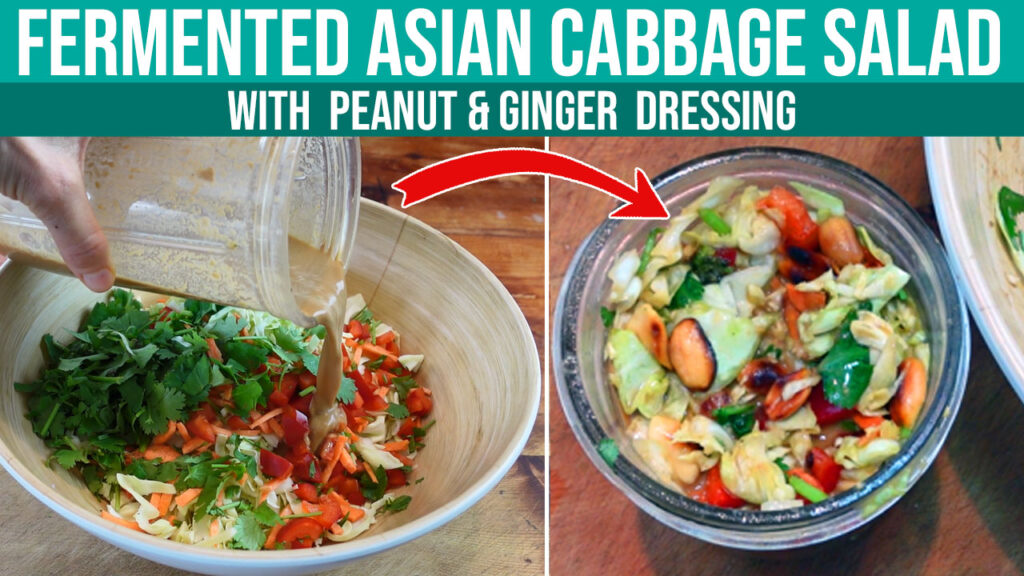
Fermented Carrot Salad
Stuffed Fermented Peppers
Fermented Beans
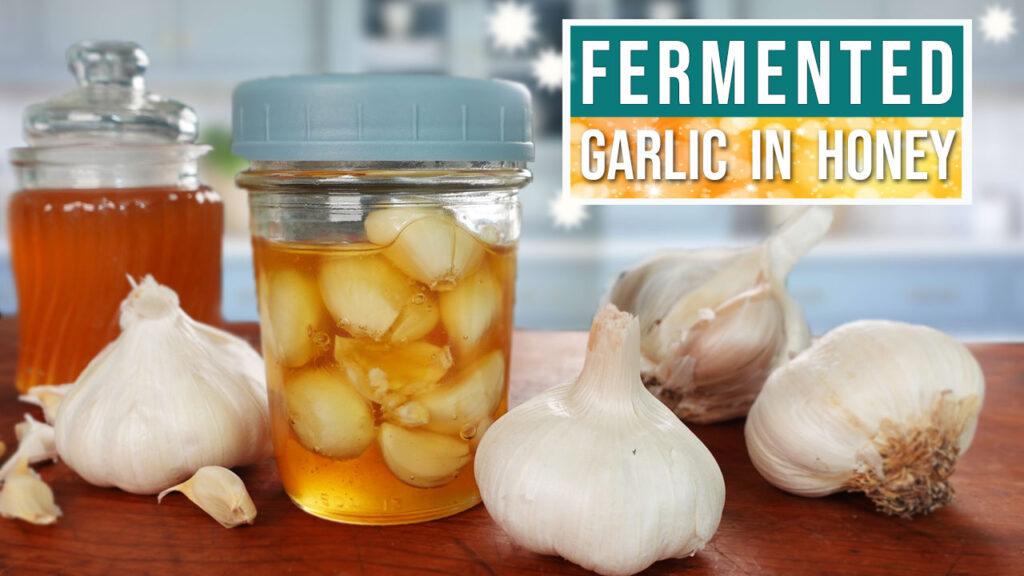
Fermented Garlic
Sauerkraut Masterclass