This “Stuffed Fermented Peppers” post contains affiliate links. Please read my affiliate disclosure.
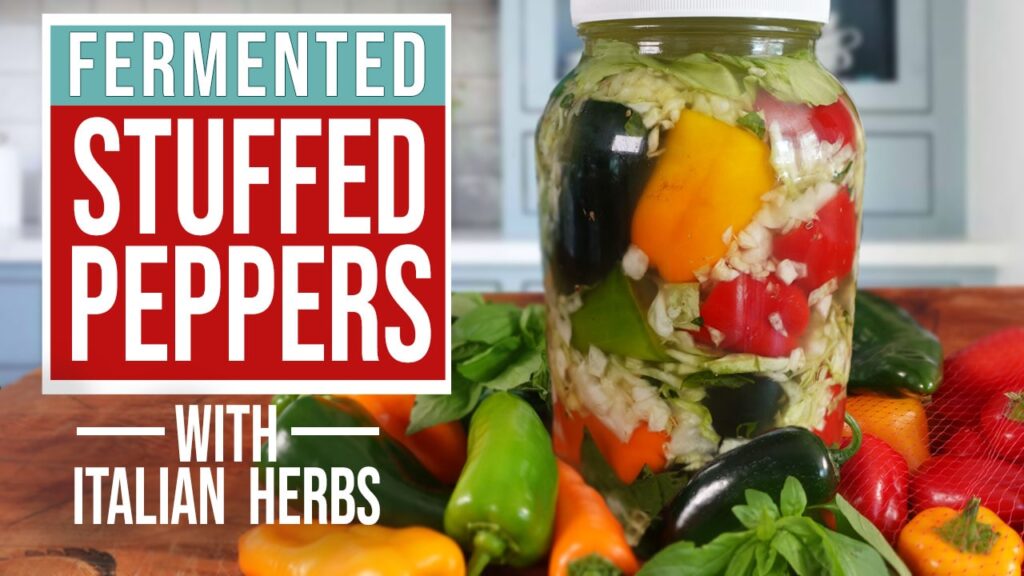
The Ultimate Fermented Peppers Recipe: Peppers Stuffed with an Italian Herb & Spice Sauerkraut
Fermented peppers are quite popular in the fermenting world due to their unique flavor and health benefits.
In particular, this recipe is extraordinary due to the Italian herb & spice sauerkraut that the peppers are stuffed with. The sauerkraut adds complexity to the pepper flavor, boosts the probiotic count, and supercharges the nutritional elements.
The Magic of Fermented Peppers
One of the key benefits of fermented peppers & cabbage is their improved digestibility. During the fermentation process, beneficial bacteria produce enzymes that help break down the complex sugars and proteins found in the foods, making them easier for our bodies to digest. This can be very beneficial for individuals with digestive issues. <1>
Another advantage of fermented peppers is their increased vitamin content. This is because the beneficial bacteria responsible for fermentation, increase the bioavailability of nutrients such as vitamin C, making it easier for our bodies to absorb and utilize. Additionally, the beneficial bacteria of fermented foods also enhance vitamin A, K2, and several of the B vitamins.
Fermented peppers & cabbage offer a unique and complex flavor profile. The fermentation process brings out the natural sweetness of the peppers while also adding a tangy and slightly sour taste. The combination of flavors makes fermented peppers stuffed with Italian herb & spice sauerkraut, a delicious & versatile addition to any meal.
Let’s dive in and make these extraordinary stuffed fermented peppers!
Stuff & Ferment The Peppers Along With Me!
If you are a visual learner and want to stuff & ferment the peppers along with me, watch the video below 😊 I also provide in the video more details that are especially helpful to newbie fermenters.
Recipe Ingredients
Although the ingredients are simple, once combined & fermented, they will create a tantalizing flavor profile! You’ll find the specific measurements in the recipe card at the bottom of this post.
Cabbage
This incredible superfood is packed with nutritional goodness and is sure to leave you feeling fantastic. Not only is cabbage delicious and versatile, but when fermented, it supercharges the food with abundant probiotics.
Peppers
From the fiery blend of hot peppers to the delightful sweetness of mild and sweet varieties, there’s a pepper for everyone. You can use any kind of pepper variety with this recipe and feel free to mix it up with different levels of heat & sweet.
Fresh Basil
This incredible herb brings a burst of freshness and flavor. The aroma of fresh basil is simply intoxicating and instantly transports one to the streets of Italy!
Spice Seeds
The recipe calls for fennel seeds, but dill or caraway seeds are alternatives. Spice seeds are the secret ingredient that add a zesty flavor.
Salt
You can use any type of salt with fermentation such as sea salt, kosher, Pink Himalayan, etc. However, make sure the salt does not contain anti-caking agents since those chemicals can interfere with fermentation. Read the label of the salt to make sure it reads salt and nothing else.
Recipe Instructions
Yield: 1 gallon / 4 Liter jar
Step 1: Prepare The Brine
Add the salt to the water, then mix to incorporate them. Set the brine aside for later use.

Step 2: Prepare The Cabbage
When it comes to preparing the cabbage, there’s no need to wash it. This is because the outer leaves will be removed and the newly exposed inner leaves will be free from contaminants, dirt and/or bugs. However, if you do need to clean your cabbage, a quick rinse with tap water will suffice.
Remove the outer leaves and discard them.

Next peel off 1 to 2 of the newly exposed inner leaves and keep them intact the best you can. Set them aside for later use.

Quarter the cabbage and cut out the cores. No need to throw the cores away, instead combine them with other vegetables to make a nutrient dense soup stock.

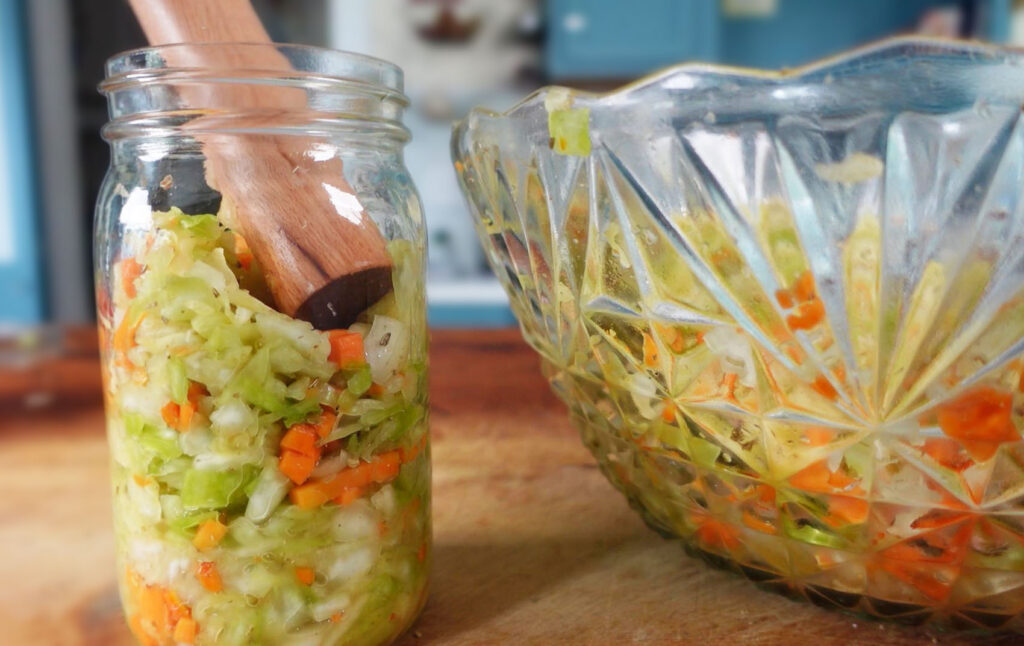
Next, slice the cabbage into thin strips. Then cross-slice again and place in a large mixing bowl.

Step 3: Prepare The Spice Seeds
It’s now time to freshly grind the fennel seeds.
Some people don’t like fennel so if that’s the case, substitute the fennel seeds with whole dill or caraway seeds. Whichever seed you use, freshly grind them just the same.

Place the seeds in a little spice-grinder like this and a moment later, viola! You now have fresh ground spice seeds that are bursting with flavor & aroma!
Sprinkle the ground seeds over the cabbage in the bowl.

Step 4: Add The Brine & Basil
Pour the brine over the cabbage. Then with fresh washed hands, toss to mix everything together.

Next, slice up one of the bundles of basil and add it to the cabbage that is resting in the brine. Give it another mix to incorporate everything together.
Note: Only slice up one of the basil bundles. The other basil bundle will be implemented later.

Step 5: Rest The Cabbage
The cabbage needs to rest in the brine for at least two hours. The salty brine will work on the cabbage, softening it and extracting some of its natural juices. This will make the cabbage easily stuff-able into the peppers.
Meanwhile you can prep the peppers, do some clean-up, get the jar ready, run errands, work in the office, etc. The cabbage can rest in the brine for up to 6 hours, so it’s not a problem if those errands take longer than expected.
Step 6: Prepare The Peppers
There’s no need to wash or rinse the peppers if they are unsprayed from the garden or farmer’s market. If they’re from the grocery store, you can choose to rinse them if you wish.
Note: Here’s some good news for those concerned about pesticides…. The good bacteria responsible for fermentation, enzymatically degrade pesticide residue during the fermentation process, significantly reducing its presence <2>
Select peppers that have some rounding in their body and a nice wide top that will allow the cabbage to be easily stuffed.
A narrow section toward the bottom of the pepper is ok so long as at least the upper body has girth.

This large jalapeno is perfect because it’s nice and round.

This Anaheim pepper is also an example of having good stuff-ability.

Lastly, this is a mini sweet bell pepper that has a nice round body for stuffing. If you have a lot of large peppers, then it’s good to have lots of little ones too so that they can fill in the gaps. You’ll see what I mean shortly.

Slice off the pepper tops. Then with your fingers or a paring knife, pull out the inner portion containing the heart of the seeds. Tap out any remaining seeds.
Repeat the process with all the peppers.

Step 7: Prepare The Equipment
Wash the jar, lid and fermenting weight in hot soapy water, sterilization is not required. Then set the equipment on a clean kitchen towel until ready for later use.
Step 8: Stuff The Peppers & Load The Jar
Once it’s been a couple of hours, the cabbage resting period is complete. With clean washed hands, massage the cabbage a bit more, taking note of the tenderness transformation.
Take a large handful of the cabbage and place it at the bottom of the jar. Then take the other bundle(s) of basil and place at the bottom of the jar with the cabbage.

Take up a pepper and stuff the cabbage inside. I have found using a chopstick can help with the stuffing process because it can more easily push the cabbage into the parts of the pepper that are narrow.


Once stuffed, place the pepper into the jar and repeat with the next one.

Stuff and place the smaller peppers in between the large ones to fill the gaps.

Periodically along the way, add some cabbage into the gaps that even the small peppers can’t fill.

Also add some scoops of brine and then keep on with the pepper process!

Fill the container with the stuffed peppers, cabbage and brine up to the jar threads.

Step 9: Make A Cabbage Leaf Topper
Remember those cabbage leaves we set aside from earlier? Use them to create a cabbage leaf topper by layering them overtop the contents below.

Once the cabbage leaf topper is in place, use your fist to press everything down beneath the brine. It’s important that all the contents are below the brine because the brine is what protects the food from oxygen exposure during the fermentation period. It’s the oxygen exposure that can invite mold to form.
Note: You may find it helpful to set the jar on a plate to catch any brine overflow that may occur when you press down.

Step 10: Add The Fermenting Weight & Lid
Place the fermenting weight on top of the cabbage leaf topper.

It may be a tight fit, but press the lid down hard enough to capture the jar threads and hold securely.

Fermenting Lids
You may notice in the photo below I’m using a specialty fermenting lid. This allows the lid to be on tight while permitting the fermentation gasses to escape through the top valve.
If you would like to browse specialty fermenting lids for gallon size jars, click here.

Note:
A specialty fermenting lid is not required. If you don’t have one, simply use the regular lid that belongs to the jar.
When you place it on, don’t tighten it all the way. The loose fit will allow the fermentation gasses to escape, eliminating the need to burp the jar.
The Fermentation Period
Look at these gorgeous peppers, wow!
For the fermenting period, keep them on the countertop at room temperature for 7 to 10 days. An environmental temperature between 72F/22C – 80F/27C is best.

The fermentation typically needs at least 7 days. The reason why I don’t recommend longer than 10, is because the peppers will ferment quickly due to being high in natural sugars. The quick fermentation speed can cause the peppers to become mushy if allowed to ferment too long.
However, even with a short fermentation period of 7 to 10 days, the fermented peppers will be soft & tender (but not mushy). Therefore, remove any expectations of crispy & crunchy.
Tip:
If you live in a hot and humid climate, then a fermentation period of 5 days may be better since the peppers will soften more quickly in that type of environment.
On the other hand, if the peppers are fermenting in an environment below 70°F/21°C, then 8-10 days may be better since the peppers will soften slower in cool temps.
Ending The Fermentation
When you decide to end the fermentation, remove the weight and cabbage leaf toppers. Next, take a smell test before a taste test.
If the fermented peppers have a soury-sweet smell, you’re good to go because that’s what a healthy fermentation smells like! However, if it smells foul or offensive, that means bad bacteria took over and the fermentation failed. If this is the case, do not eat it, rather throw it away.
Note:
Don’t throw out the cabbage leaf toppers! They too have fermented over the past week and are not only edible, but nutritious & delicious!
How To Store The Peppers
If you’ve ended the fermentation and the peppers are a success, you can now prepare them for storage.
If your refrigerator is like mine, a gallon size jar will not fit. Therefore, transfer the contents to smaller jars.
You may ask, why not ferment everything in small jars to begin with? You can if all the peppers are small enough, but if using large peppers, a big jar is needed. The fermentation process will make the peppers tender and flexible so that they can conform to small jars afterwards.

Place the jars in the refrigerator where they will last for 6+ months.

Enjoy Your Stuffed Fermented Peppers
This is the fermented basil bundle from the bottom of the original jar. Don’t discard it because fermented basil is delicious!

Here is one of the ways I use fermented basil with my meals… I create a garden fresh vegetable dish combining both sauteed and raw veggies. In the photo below, I have the veggies over top some rice noodles.
I garnish the meal by slicing up the fermented basil leaves and sprinkle them over the dish. It adds fantastic flavor and elevates the enjoyment of the meal!

Additionally, you can add any kind of sauce that tastes good to you and incorporate some chicken or other meat. If you’re vegan, leave the dish as is with the veggies & noodles. Everyone can prepare the meal the way they like it!
Then on the side is a fermented pepper that I’ll slice up and enjoy as I make my way through this scrumptious & nutritous dinner!

Summing Up…
Overall, fermented peppers stuffed with an Italian herb & spice sauerkraut, are a tasty and nutritious addition to any diet.
Whether you enjoy them on their own as a snack, or use them as an accompanist to your favorite meals, fermented peppers are a great way to spice it up while also reaping their health benefits. FYI: Never cook the fermented peppers since heat will kill the probiotics. Add them to any meal after the cooking has commenced.
So what are you waiting for? Make this Stuffed Fermented Peppers Recipe today! …And be sure to watch the video for additional tips… Happy Fermenting!

Stuffed Fermented Peppers
Equipment
- 1 Gallon / 4 L Jar
- 1 Spice Grinder Optional
- 1 Specialty Fermenting Lid This type of lid is optional. A regular jar lid will work just as well.
Ingredients
- 3.5 – 4 lb Cabbage
- Peppers Enough to fill the jar
- 2 – 3 bundles Fresh Basil
- 2 tbsp Whole Fennel Seeds Optionally substitute with whole dill or caraway seeds.
- 1.5 tbsp Salt Fine grain. Use a salt that does not contain anti-caking agents since these chemicals can interfere with fermentation.
- 6 c Water
Instructions
Prepare The Brine
- Add the salt to the water, then mix to incorporate them. Set the brine aside for later use.
Prepare The Cabbage
- There's no need to wash it because the outer leaves will be removed and the newly exposed inner leaves will be free from contaminants, dirt and/or bugs. However, if you do need to clean your cabbage, a quick rinse with tap water will suffice.
- Remove the outer leaves and discard them.
- Peel off 1 to 2 of the newly exposed inner leaves and keep them intact the best you can. Set them aside for later use.
- Quarter the cabbage and cut out the cores.
- Slice the cabbage into thin strips. Then cross-slice again and place in a large mixing bowl.
Prepare The Spice Seeds
- Place the seeds in a little spice-grinder and loosely grind.
- Sprinkle the ground seeds over the cabbage in the bowl.
Add The Brine & Basil
- Pour the brine over all the cabbage ingredients in the bowl. Then with fresh washed hands, toss to mix everything together.
- Slice up one of the bundles of basil and add it to the cabbage that is resting in the brine. Give it another mix to incorporate everything together.
Rest The Cabbage
- The cabbage needs to rest in the brine for at least two hours. The salty brine will work on the cabbage, softening it and extracting some of its natural juices. This will make the cabbage easily stuff-able into the peppers.Meanwhile you can prep the peppers, do some clean-up, get the jar ready, run errands, work in the office, etc. The cabbage can rest in the brine for up to 6 hours, so it’s not a problem if those errands take longer than expected.
Prepare The Peppers
- You can use any type of pepper: hot, mild, sweet, large, medium or small.
- There’s no need to wash or rinse the peppers if they are unsprayed from the garden or farmer’s market. If they’re from the grocery store, you can choose to rinse them if you wish.
- Whichever variety (or varieties) of pepper you use, select ones that have some rounding in their body and a nice wide top that will allow the cabbage to be easily stuffed. A narrow section toward the bottom of the pepper is ok so long as the upper body has girth.

- If you have a lot of large peppers, then it’s good to have lots of little ones too so that they can fill in the gaps when loading the jar later.
- Slice off the pepper tops. Then with your fingers or a paring knife, pull out the inner portion containing the heart of the seeds. Tap out any remaining seeds. Repeat the process with all the peppers.
Prepare The Equipment
- Wash the jar, lid and fermenting weight in hot soapy water, sterilization is not required. Then set the equipment on a clean kitchen towel until ready for later use.
Stuff The Peppers & Load The Jar
- Once it's been a couple of hours, the cabbage resting period is complete. With clean washed hands, massage the cabbage a bit more, taking note of the tenderness transformation.
- Take a large handful of the cabbage and place it at the bottom of the jar. Then take the other bundle(s) of basil and place at the bottom of the jar with the cabbage.
- Take up a pepper and stuff the cabbage inside. I have found using a chopstick can help with the stuffing process because it can more easily push the cabbage into the parts of the pepper that are narrow.

- Once stuffed, place the pepper into the jar and repeat with the next one.

- Stuff and place the smaller peppers in between the large ones to fill the gaps.

- Periodically along the way, add some cabbage into the gaps that even the small peppers can’t fill. Essentially what is to be avoided is large air pockets.

- Also add some scoops of brine and then keep on with the pepper process.

- Fill the container with the stuffed peppers, cabbage and brine up to the jar threads.

Make A Cabbage Leaf Topper
- With the cabbage leaves set aside from earlier, use them to create a cabbage leaf topper by layering them overtop the pepper & kraut contents below.

- Once the cabbage leaf topper is in place, use your fist to press everything down beneath the brine. It's important that all the contents are below the brine because the brine is what protects the food from oxygen exposure during the fermentation period. It's the oxygen exposure that can invite mold to form.

- You may find it helpful to set the jar on a plate to catch any brine overflow that may occur when you press down.
Add The Fermenting Weight & Lid
- Place the fermenting weight on top of the cabbage leaf topper.

- It may be a tight fit, but press the lid down hard enough to capture the jar threads and hold securely.

The Fermentation Period
- For the fermenting period, keep them on the countertop at room temperature for 7 to 10 days. An environmental temperature between 72F/22C – 80F/27C is best.

- The fermentation typically needs at least 7 days. The reason why I don’t recommend longer than 10, is because the peppers will ferment quickly due to being high in natural sugars. The quick fermentation speed can cause the peppers to become mushy if allowed to ferment too long.However, even with a short fermentation period of 7 to 10 days, the fermented peppers will be soft & tender (but not mushy). Therefore, remove expectations of crispy & crunchy.
- Tip: If you live in a hot and humid climate, then a fermentation period of 5 days may be better since the peppers will soften more quickly in that type of environment.On the other hand, if the peppers are fermenting in an environment below 70°F/21°C, then 8-10 days may be better since the peppers will soften slower in cool temps.
Ending The Fermentation
- When you decide to end the fermentation, remove the weight and cabbage leaf toppers. Next, take a smell test before a taste test. If the fermented peppers have a soury-sweet smell, you’re good to go because that's what a healthy fermentation smells like. However, if it smells foul or offensive, that means bad bacteria took over and the fermentation failed. If this is the case, do not eat it, rather throw it away.
- Don't throw out the cabbage leaf toppers. They too have fermented over the past week and are not only edible, but nutritious & delicious.
How To Store The Peppers
- If your refrigerator is like mine, a gallon size jar will not fit. Therefore, transfer the contents to smaller jars. The fermentation process will have made the peppers tender and flexible so that they can conform to small jars.

- Place the jars in the refrigerator where they will last for 6+ months.
Video
Citations
<1> Norris, T. (2018, September 29). Probiotics and digestive health: Benefits, risks, and more. Healthline. https://www.healthline.com/health/probiotics-and-digestive-health
<2> Microbial Detoxification of Residual Pesticides in Fermented Foods: https://www.ncbi.nlm.nih.gov/pmc/articles/PMC10048192/#:~:text=However%2C%20during%20the%20fermentation%20processing,the%20starter%20and%20accompanying%20microflora


