This “How To Make Apple Cider Vinegar” post contains affiliate links. Please read my affiliate disclosure.
How to Make Apple Cider Vinegar: A Wild Fermentation
Apple cider vinegar, often referred to as ACV, has gained immense popularity due to its numerous health benefits and versatile uses.
While you can easily purchase it at the store, there’s something incredibly satisfying about making your own homemade apple cider vinegar.
In this comprehensive guide, I’ll walk you through the step-by-step process of making apple cider vinegar right in your own kitchen.
A Note to Beginner Vinegar Makers
Although this article walks you through all the steps on successfully making homemade apple cider vinegar, the video goes into much more detail. Additionally, visual examples of common troubleshooting situations are given. So if your a vinegar making newbie, watch the video below as well!
Benefits of Apple Cider Vinegar
Before we dive into the DIY process, let’s explore some of the fantastic benefits of incorporating apple cider vinegar into your daily routine:
1. Digestive Health: Apple cider vinegar can aid digestion by increasing the acidity in your stomach. It may help alleviate issues like indigestion and acid reflux1
2. Blood Sugar Control: ACV may help improve insulin sensitivity and lower blood sugar levels, making it a valuable addition for people with diabetes.2
3. Heart Health: Regular consumption of apple cider vinegar might contribute to a healthier heart by lowering cholesterol and blood pressure.3
4. Antimicrobial Properties: ACV contains acetic acid, which has natural antibacterial and antifungal properties. It can be used to disinfect surfaces and even as a natural deodorant.
5. Skin and Hair Care: Diluted apple cider vinegar can be used as a toner to balance skin pH and as a hair rinse to add shine and remove buildup.
6. Rich in Antioxidants: ACV contains antioxidants that can combat oxidative stress and protect your cells from damage.4
Now that you know a handful of the incredible benefits of apple cider vinegar, let’s embark on the journey of creating your own!
Technically Speaking…
I feel the need to point this out… Apple cider vinegar is made from apple juice while apple vinegar is made from apples pieces and/or apple scraps.
Most guides are technically making ‘apple vinegar’ but through the decades, apple vinegar and apple cider vinegar have become synonymous, typically used interchangeably.
So whether you will be making the vinegar from fresh apple juice or from apple pieces, the end result is the same: delicious homemade vinegar with incredible health benefits.
This guide will include instructions for both mediums: apple pieces & juice.
Ingredients and Equipment Needed For Making Apple Cider Vinegar:
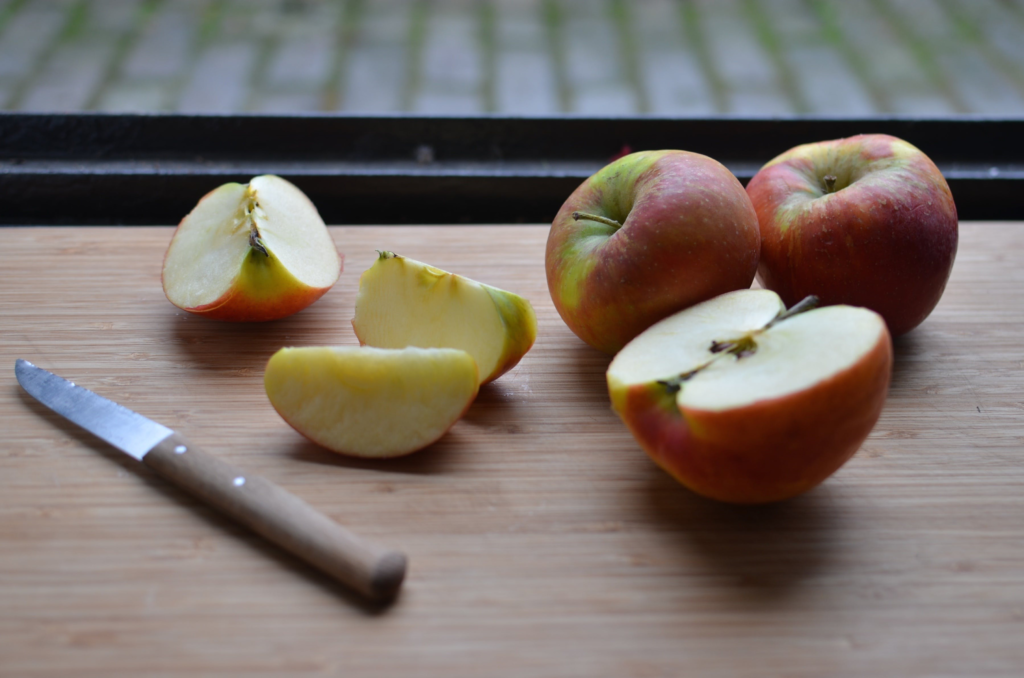
Apples
Variety: Use whichever apple you have on hand. Any variety including crab apples will work. Sweeter apples will result in a more palatable vinegar while tart apples such as crab apples, will result in a more sour vinegar. Any apple will ferment using the same method and develop into a healthy tonic. The choice is yours!
No Sprays: It’s best to use apples that have not been sprayed with chemicals since the needed beneficial microbes for the fermentation are predominately located on the skin of the fruit. However, if conventional apples are all you have on hand, it’s not an automatic fail sentence to your vinegar. Give it go!
Apple Form: You can use 3 forms of apples: apple pieces that include both the skin & flesh, apple scraps such as only the skins, and/or fresh apple juice.
Fresh or Frozen: The apples can be fresh, older with withery skin (providing they are not rotting nor molding), or previously frozen. Often people ask me if they can use their apple scraps that have been stored in the freezer. The answer is, once they are defrosted, yes you can!
A Note About Using Apple Juice:
In this guide I will include making vinegar from apple juice. But first it’s important to know that if you want to make apple cider vinegar from apple juice, it must be fresh apple juice.
Store bought apple juices and ciders have been pasteurized which kills the natural & needed yeasts and bacteria to ferment the apple juice into vinegar. Therefore, make your own fresh apple juice or ensure that the juice you’re using 100% raw and never heated like what’s found at a farmer’s market.
Sugar
Sugar is essential for feeding the yeast during the fermentation process.
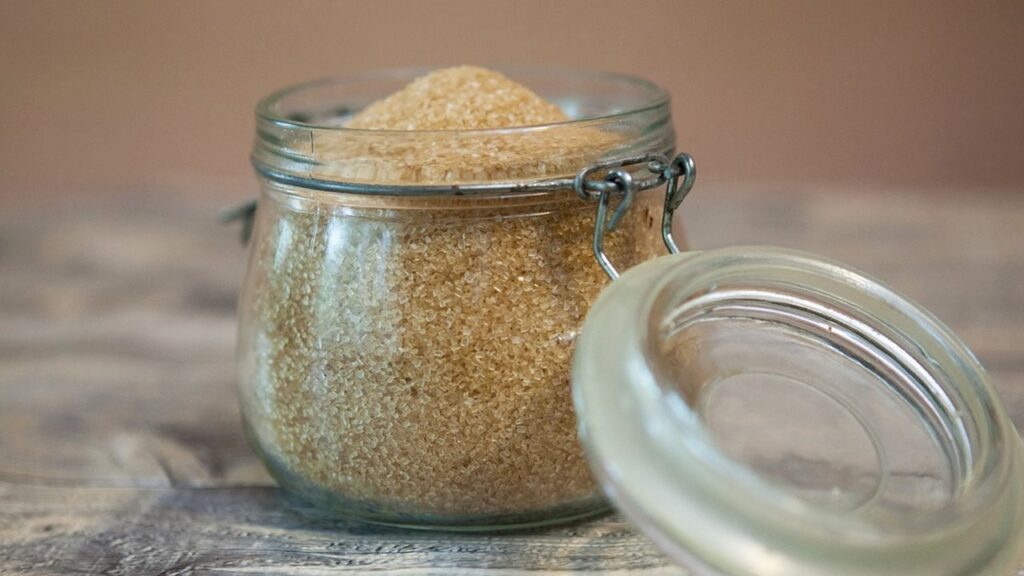
I recommend using granulated cane sugar. Make sure that the sugar is also unbleached since the bleaching agents can possibly disturb the fermentation process. To know if your sugar is unbleached, the package will say so on the front label.
- If the package does not say if it is unbleached, then that means it is bleached.
- If the sugar is pure white, then it has been bleached. If the sugar is golden brown in color, then it has not been bleached.
- Common names for unbleached sugar are: Raw Sugar, Turbinado Sugar and Sugar in the Raw.
Jar
You can use any size jar such as a quart/liter for smaller batches and up in size for larger batches.
A wide mouth jar is easier to work with and provides better exposure to air since oxygen is required for the first phase of the fermentation.
Ensure the jar is washed in hot soapy water before use to prevent bad pathogens from interfering with the fermentation process.
Jar Cover
Use a coffee filter, paper towel or cloth to cover the mouth of the jar. This allows air to circulate while preventing contaminants and/or fruit flies from entering. I do not recommend using a cheese cloth because they are too porous.
Secure the cover with a rubber band or jar ring to keep it on the jar tight.
Water
Use non-chlorinated water because chlorine can inhibit the growth of the good microbes needed for the fermentation process.
Room temperature water is best to promote the growth of the good microbes.
Stirring Tool
Choose a bamboo chopstick, plastic or wooden utensil to stir the mixture. Stirring during the fermentation process will prevent possible mold and kahm yeast growth.
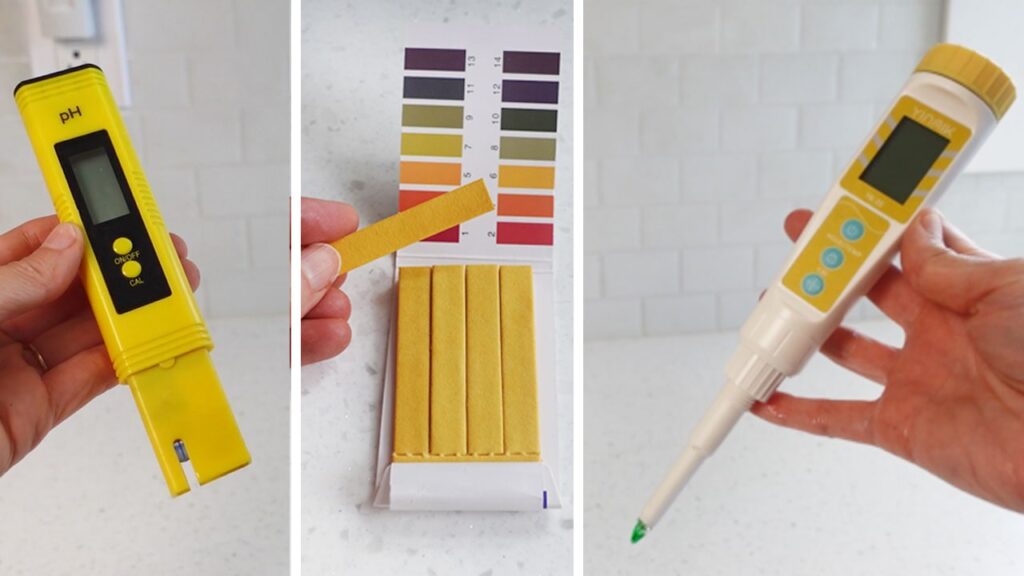
PH Tester
At the end of the fermentation, you will need to take a PH reading. If the PH is below 4, you’ve got vinegar!
Use either a digital PH reader or PH strips to take the reading. If you don’t have any type of PH reader, you can browse options here.
Instructions For Making Apple Cider Vinegar:
Step 1: Prepare the Apples
Apple cider vinegar is flexible when it comes to apple varieties. Use what’s available or to your taste preference, whether sweet or tart. You can use just the apple flesh or include the skin and core which is a great way to utilize apple scraps from other recipes.
Unless there’s some bird poo or other dirt debris on the apples, there’s no need to wash them. The microbes needed for fermentation are naturally present on the fruit skin and you don’t want to wash them down the drain.
If you are making the vinegar from apple juice/cider, simply make sure that is fresh or raw as previously explained in the above section of this article.

Step 2: Load the Apples
Wash a jar with hot soapy water, sterilization is not required. Add handfuls of apple chunks or scraps to fill the jar no more than half way.
For those of you making the vinegar from fresh or raw apple juice/cider, fill the jar.
Step 3: Add Sugar
For a quart/liter-sized jar, add 2 tablespoons to 1/4 cup (30-60g) of granulated cane sugar. If using a larger jar, simply multiply the 2tbsp sugar measurement times the size of jar being used. If math isn’t for you, check out the measurement table in the printable recipe card at the end of this article.
The sugar provides essential food for the microbes during fermentation, enhancing the fermentation strength and flavor.
Use the lower end amount of sugar recommended above if you are using fresh or raw apple juice/cider.
Step 4: Add Water
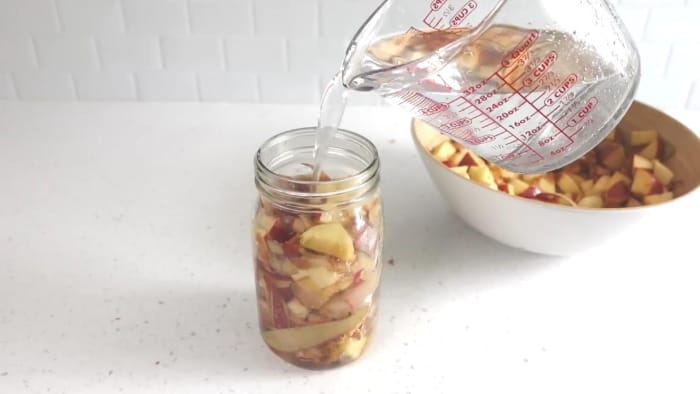
Fill the jar of apples and sugar with room temperature, non-chlorinated water and give the mixture a good stir. If there are any remaining sugar granules don’t worry, they will dissolve by the next day on their own.
Do not add any water if you are making the vinegar from fresh or raw apple juice/cider.
Step 5: Cover and Secure
Cover the jar opening with a coffee filter, paper towel or cloth and then secure it with a rubber band or a jar ring.
Label the jar with the starting date.
Important: Do not use specialty airlock or airtight lids because oxygen is an important part of vinegar making. If the mixture doesn’t get oxygen, you’ll end up making terrible tasting apple wine instead of delicious apple vinegar!
Trust me, I’ve made the mistake of doing so and I want to save you from the same mishap!

Fermentation Period
Place the jar on a countertop, away from direct sunlight. However regular room light is fine. Allow the apple/sugar mixture to remain on the counter for approximately 30 days.
- If you are making the vinegar from fresh or raw juice/cider, the length of time on the counter is the same.
No matter which way you are making the vinegar, whether it be with apple pieces or juice, I’ll guide you step-by-step on what to do when the vinegar transformation has commenced. Keep reading onward!
The Science of Vinegar Fermentation
I’m going to take a quick detour at this point to explain the basic science behind vinegar making at home. With the basics covered, you’ll better understand the process and boost your confidence.
Phase 1
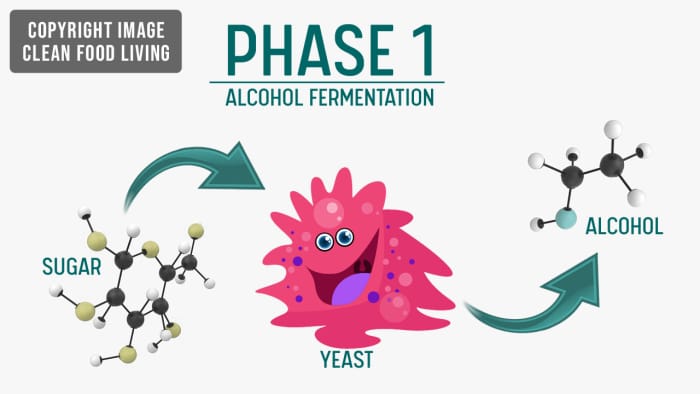
There are 2 phases of vinegar fermentation. In phase 1, the yeasts are the main players of the show. The yeasts consume the sugar including the natural fruit sugar of the apples or juice and release carbon dioxide and alcohol as their by product. This phase can vary, lasting up to 2 or 3 weeks.
Once the sugar has been consumed, the yeasts begin to die off. Their job is done and the vinegar fermentation enters phase 2.
Keep in mind, the 2 phases of vinegar fermentation are not a hard line, rather they are a gradual transition from one into the other so there is some overlapping.
Phase 2
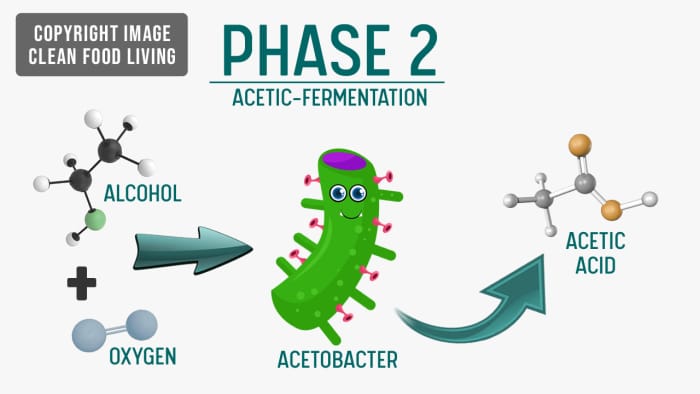
In phase 2 a bacteria called Acetobacter takes over. This bacteria is naturally present in the air, floating all around us. The Acetobacter find their way into the jar of apples. They don’t feed on sugar like yeasts do, rather they feed on the alcohol that the yeasts created from phase 1.
As the Acetobacter feed on the alcohol, they release acetic acid as their byproduct. By the end of phase 2, there is no more alcohol remaining since the Acetobacter consumed it all and there is no more sugar because the yeasts from phase 1 consumed it all.
What remains is water & acetic acid, that’s your vinegar!
The Fermentation Period
Weeks 1 & 2
The following applies to making apple cider vinegar with either apple pieces or fresh/raw apple juice:
Stir
Stir the mixture daily or at least every other day to prevent mold or kahm yeast growth. Daily stirring also improves aeration which aids the vinegar fermentation process and improves the vinegar flavor.
If you are making the vinegar from raw apple juice/cider, you too should stir it daily to prevent surface funk such as kahm yeast or mold.
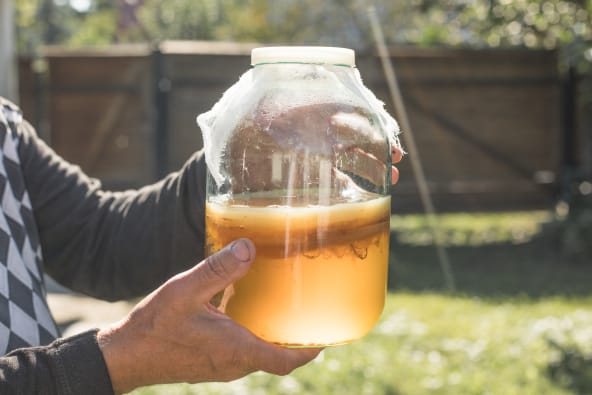
Note: Sometimes a “mother” will form on the top surface of the vinegar. It is a gelatinous mass that grows on the surface. It looks like a Kombucha SCOBY although it is made up of different microbes specific to vinegar.
At times a gelatinous mother will form over top the surface and sometimes it won’t. Don’t be sad if your ACV doesn’t form a surface mother since it commonly doesn’t.
If your vinegar does form a gelatinous mother, stop daily stirring since it has formed a protective coating over the apples and/or surface area and you don’t want to interrupt the mother’s continuing development.
Bubbles
Within the first week you will notice bubbles forming. They are a sign that the fermentation is in full swing, phase 1 of the vinegar fermentation process.
The bubbles can begin as early as 3 days or as late as 10 days. Remember, they are a result of the yeasts consuming the sugars and releasing carbon dioxide gasses.

Smell
Due to the yeasts releasing alcohol in addition to the carbon dioxide, it’s common for the apple fermentation to develop an alcohol smell. But as phase 2 takes over within 2-3 weeks, the alcohol smell of phase 1 will diminish.
Cloudiness
It is normal for the liquid to become cloudy and is a sign of active fermentation by the good microbes.
Weeks 3 & 4
Phase 2 will be taking over by this time and here are the signs that accompany it:
The Apples
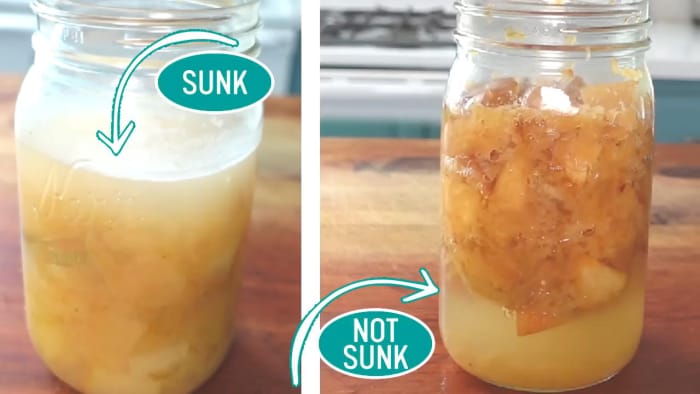
If you used apple pieces to make the vinegar, you may notice that they have sunk to the bottom of the jar. This is normal. However, sometimes they don’t sink! So whether the apples sink or do not sink, either scenario is okay.
Obviously if you are making the vinegar from raw apple juice/cider, then sinking or floating apple pieces does not apply.
No Bubbles
Since the yeasts are dying off as phase 2 takes over, the bubbles will also diminish. By week 4 there should be no more bubbles.
Smell
Again, since the yeasts are dying off as phase 2 takes over, the alcohol smell will also diminish. The Acetobacter of phase 2 are now abundantly releasing acetic acid, shifting the smell from alcoholic to acidic.
Sediment
A sediment may develop at the bottom of the jar. This is normal and should not cause concern.
Ending The Vinegar Fermentation
Strain
Around the 30-day mark, strain out the apples using a fine mesh strainer.
If you want to reduce the sediment even more, strain it again through a coffee filter. However, this is optional. If you’ve ever noticed the raw apple cider vinegar at the grocery store, there is sediment at the bottom of the jar and is referred to as “The Mother”.
Obviously if you are making the vinegar from raw apple juice/cider, then straining the apple pieces does not apply. You can move on to the next step.

PH Test:
Take a PH reading with a digital PH meter or paper PH test strips. The reading should be at least 4.0 and preferably between 3.0 to 3.5 for the best tasting vinegar.
If the vinegar has a PH below 3, that is ok, but will taste extremely acidic and won’t be very palatable. If this is the case, I recommend adding a little water to bring the PH up to between 3.0 and 3.5.
A little water will go a long way so start with only adding a wee bit of water, PH test, then add another dash of water if the PH still needs to rise. PH test again… Repeat until the PH is between 3.0 and 3.5.

This next step is optional. Often times I want to be 110% sure that phase 2 of the vinegar fermentation process has completed. Therefore after straining the apples, I will place the breathable cover back on the jar with the rubber band and allow it to sit on the pantry counter another 2 weeks. Afterwards, I’ll prepare it for long term storage.
By the way, my How To Make Apple Cider Vinegar video is packed with detailed information that addresses common questions and troubleshooting. Be sure to check it out, it’s worth the watch! You can also view it on YouTube.
Storage
To store the vinegar, keep it in a dark place like cupboard with a non-metal lid that is tightly secured on the lid. I like to use these plastic wide mouth jar lids. Apple cider vinegar can last for years without refrigeration.
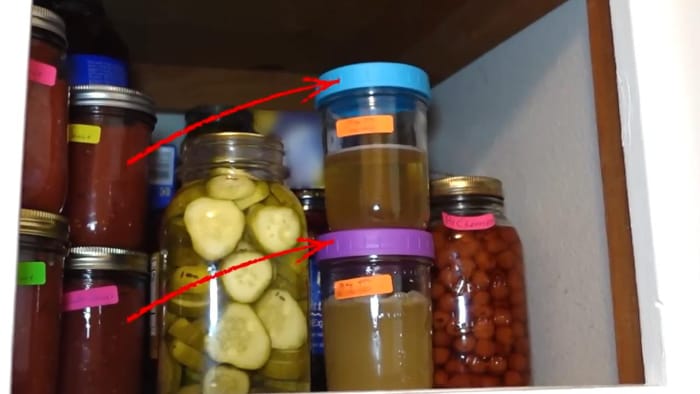
Vinegar making is a month long process so you’ll need some patience. But once its commenced, you won’t regret it!
While you’re waiting, why not try out some quick ferments that take only days or a couple of weeks. Some of my favorites are fermented cooked beans, fermented corn salsa, and fermented onions.
Troubleshooting
Kahm Yeast: If you didn’t stir or shake the apples or juice then you may see a thin and uniform white coating develop over the surface. This is kahm yeast. Although it’s unattractive, it is harmless.
- You can choose to either dab it out with a paper towel or stir it into the apple mixture or juice. To prevent it from coming back, continue daily stirring or shaking until the fermentation period is ended. Learn more about kahm yeast here.
Mold: Again if you didn’t stir or shake the apples or juice, mold may develop. This is why it’s important to keep an eye on the vinegar fermentation process on a regular basis. If you catch the mold soon enough, you can simply lift it out with a utensil. Learn more about mold here.
No Mother: Most of the time my apple vinegars do not form a gelatinous mother over top even though I wish it would! If your vinegar also does not form a gelatinous surface mother, don’t dismay.
- Trust me, you did nothing wrong and this is quite common. It just means that your vinegar’s mother is the sediment at the bottom of the jar just like what is seen with store bought ACV.
More: In my How To Make Apple Cider Vinegar video, I provide examples and visual demonstration of kahm yeast and mold. If you want to learn more about those issues as well as other helpful tips, I highly recommend watching the video that accompanies this article!
Ways to Use Apple Cider Vinegar
Your homemade apple cider vinegar is a versatile addition to your kitchen. Here are some creative ways to use it:
1. Salad Dressings: Substitute store-bought vinegar with your homemade ACV for vibrant and flavorful dressings.
2. Marinades: Create delicious marinades for meats, tofu, or vegetables.
3. Pickling: Make homemade refrigerator pickles by combining apple cider vinegar with your favorite vegetables and spices.
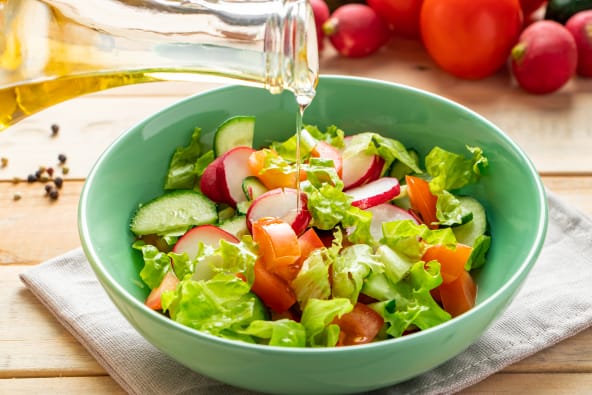
4. Health Tonic: Take a teaspoon of ACV diluted in water as a daily health tonic to enjoy its potential health benefits.
5. Hair Rinse: Use a diluted solution as a hair rinse to add shine and remove buildup.
6. Skin Toner: Mix with water for a natural, pH-balancing skin toner.
7. Cleaning Solution: Create an all-natural cleaning solution for surfaces in your home.
8. Home Remedies: Explore various home remedies that use ACV for common ailments like sore throats, sunburn, and more.
9. Cooking: Use it in various recipes to enhance flavors and acidity.
Summing Up…
In conclusion, homemade apple cider vinegar is not only a delightful project to undertake but also a valuable addition to your kitchen for its myriad of benefits and uses.
Enjoy the satisfaction of creating this healthful elixir from scratch and discover how it can elevate your culinary and wellness experiences. Cheers to the art of apple vinegar making!
How To Make Apple Cider Vinegar
Equipment
- 1 Glass Jar Any size
- 1 Breathable Cover I.E. paper towel or coffee filter
Ingredients
- Apples (enough for 1/2 a jar of any size) Scraps, chunks or pieces
- Unbleached Cane Sugar Measurement given below
- Water See step 4
Instructions
- Apples: Any variety of apple will work including crab apples. How sweet or sour the apple is will affect the flavor of the final vinegar.You can use the flesh of the apple chopped up or all parts of the apple such as the skin and core. The apple pieces or scraps can be fresh or previously frozen.Cut out any worm holes or bad spots. No need to pick out the seeds if there are any.
- Jar: Wash the glass jar in hot soapy water, sterilization is not required.
- Fill: Add the apples into the jar, no need to pack them down. Fill the jar anywhere from 1/3 to 1/2 full.
- Sugar: Add the given amount of sugar into the jar with the apples. QUART JAR (975 ml) 2-4 tablespoons (25-50g)½ GALLON JAR (2 liters) ¼ – ½ cup (50-100g)1 GALLON JAR (3.8 liters) ½ – 1 cup (100-200g)If substituting the cane sugar with honey or maple syrup, use ½ to ¾ the amount of the cane sugar measurement.
- Water: Pour room temperature water over the apples and fill the remainder of the jar.
- Stir: Give the mixture a stir with a utensil or chopstick. Any remaining sugar granules will dissolve by the next day. Do not worry if the apples float up.
- Cover: Place a breathable cover over the jar opening such as a paper towel or coffee filter. Secure it with a rubber band. Place a label on the jar of the start date.
- Set: Place it on a countertop out of direct sunlight and stir it everyday to every other day until it's time to strain the apples. Regular stirring will prevent mold and kahm yeast.
Fermentation Time
- Allow the apple/sugar/water mixture to sit on the counter for at least 3 weeks, up to 6 weeks maximum.
Fermentation Process
- Phase 1: After about a week the mixture will become bubbly and there may be a scent of alcohol. Note: In phase 1, the natural yeasts are the main players of the show. The yeasts consume the sugar including the natural fruit sugar of the apples or juice and release carbon dioxide and alcohol as their by products. The C02 production is responsible for the bubbles and the alcohol is responsible for the scent. This phase can vary, lasting up to 2 or 3 weeks at most. Once the sugar has been consumed, the yeasts begin to die off which is the cause of the bubbles fading away. By the end of the entire fermentation process there is no more sugar remaining because the yeasts consumed it all.
- Phase 2: In phase 2 a bacteria called Acetobacter takes over. This bacteria is naturally present in the air, floating all around us. The Acetobacter find their way into the jar of apples. They don't feed on sugar the way yeasts do. Instead, the Acetobacter food is the alcohol that the yeasts created during phase 1.The Acetobacter feed on the alcohol and release acetic acid as their byproduct. By the end of phase 2, there is no more alcohol remaining since the Acetobacter consumed it all. After a month, what remains is water & acetic acid, that’s your vinegar!
- Note: The 2 phases of vinegar fermentation are not a hard line, rather they are a gradual transition from one into the other therefore there is overlapping.
- Somewhere between days 21-30 there should be no more bubbles and the smell of alcohol should be gone, replaced with the smell of sour-ness or acidity. The apples may have also sunk the bottom of the jar. A sediment at the bottom of the jar is also normal.
Ending The Fermentation
- PH Test: Take a PH reading to ensure the vinegar has the correct PH. It should be at least 4.0 and preferably 3.0 to 3.5. If the PH is above 4.5 then the fermentation process was not successful and the apple mixture is not safe to consume. Discard it if the PH is above 4.5.If the PH is lower than 3.0 that is ok, however it may be unpalatable due to being so acidic.
- Strain: Pour off the apples through a mesh strainer into a new clean jar. Press down on the apples in the strainer to work out the remaining liquid. Discard the apples when done.
- Taste Test: Taste the vinegar. You will be pleasantly surprised how much more appley and better tasting it is than the store vinegars!
An Extra Step Before Storage
- To make sure that the vinegar is positively done with phases 1 & 2, place the breathable cover back on the jar and allow it to sit on the countertop for an additional 2 weeks. During this time, no stirring or watching is needed.
Storage
- After the additional 2 weeks have passed, remove the breathable cover and replace it with a regular lid, securely tightened on the jar. Note: Metal lids tend to corrode over time, therefore it is recommended to use a plastic lid or wooden/plastic cork if applicable.
- Place the vinegar in the pantry or cupboard where you’d normally store any other type of vinegar. Vinegar can last for several years!
Video
Citations
- McDermott, A. (2023, April 21). Can you use apple cider vinegar to treat acid reflux?. Healthline. https://www.healthline.com/health/digestive-health/apple-cider-vinegar-for-acid-reflux#benefits
- MediLexicon International. (n.d.). Apple cider vinegar and diabetes: Research and tips. Medical News Today. https://www.medicalnewstoday.com/articles/317218
- Gotter, A. (2023, June 25). Apple cider vinegar for blood pressure: Does it work?. Healthline. https://www.healthline.com/health/high-blood-pressure-hypertension/acv
- Rohini Radhakrishnan, E. (2021, December 20). What does apple cider vinegar do for a woman’s body? MedicineNet. https://www.medicinenet.com/apple_cider_vinegar_for_womans__health/article.htm


