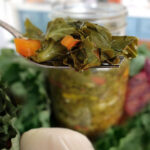
Fermented Kale and Swiss Chard
This recipe for fermented Kale and Swiss hard makes these dark leafy greens delicious in their raw form, plus probiotic-rich!
Servings: 1 Quart/Liter Jar
Equipment
- 1 Quart/Liter Jar
- 1 Glass Fermentation Weight If you don't have a glass fermenting weight, watch my video on DIY alternatives provided on my website or YouTube channel.
- 1 Lid A regular lid will work. Optionally, you can use a specialty fermenting lid.
Ingredients
- 8 cups Kale or Swiss Chard thinly sliced or chopped
- 1 cup Cabbage chopped
- ½ cup Carrots chopped
- ½ Large Onion sliced
- 2-3 cloves Garlic peeled and sliced
- 2 tbsp Spice Seeds caraway, fennel or dill
- 1 tbsp Salt use a salt that does not contain anti-caking agents
- 1.5 c Water
Instructions
Prepare the Greens
- Both kale or Swiss chard work with this recipe. Inspect the kale or Swiss chard for areas of the leaf that may have some dirt or debris. Lightly spot rinse the area that needs rinsing. If the leaf does not have dirt or debris, skip the rinse.*Do not power-rinse, use produce wash or baking soda/vinegar soaks because they wash away the needed beneficial bacteria for the fermentation.
- Cut out the stem from the leaf and discard.
- Stack several of the leaves on top of each other, then roll them up as one unit.
- Thinly slice the leaf roll. then cross-slice again into smaller pieces.
- Add all the greens to a large mixing bowl.
Prepare The Vegetables
- Remove the outer leaves of the cabbage & discard.
- With the next layer of cabbage leaves, remove 1 or 2 of them. Keep them intact the best you can and set aside for later use.
- With the remaining head of cabbage, cut a chunk off and chop it up into small pieces. Add to the mixing bowl.
- Peel & slice ½ of a large onion and add to the mixing bowl.
- Peel and chop the carrot and add to the mixing bowl.
- Peel and slice the garlic cloves and add to the mixing bowl.
- With a mini electric grinder, freshly grind the spice seed of your choice.Fresh grinding is recommended because it enhances the spice flavor, aroma and breaks open the antioxidants, making them bio-available.If fresh grinding is not an option, you can use whole seeds or pre-ground.
- Sprinkle the spice seed over the vegetables in the mixing bowl.
The Brine
- Add the salt to the water and mix thoroughly. This is enough brine for 1 quart/liter jar.
- Pour the brine over the vegetable mixture in the bowl.
- With clean hands, move the vegetable mixture around in the brine to ensure all of it comes in contact.
- Allow the vegetable mixture to rest for 15-20 minutes in the brine. This will mildly soften the vegetables so that they will load into the jar more easily.Meanwhile, this is a good time to clean up your workstation and prepare for the next steps.
Prepare The Jar & Weight
- Clean the jar and fermenting weight by washing them in hot soapy water. Sterilization is not required, hot & soapy water is sufficient.
Load the Jar
- After the rest period, return to the vegetable mixture. Once again, with clean hands, toss the mixture to coat everything in the brine. You will notice that the greens are more tender and the brine at the bottom of the bowl has turned dark green.
- Take 2 handfuls and drop them one at a time into the jar. Tip: Use a canning funnel. It will make the jar loading easier and less messy.
- From the mixing bowl, add a scoop of brine into the jar.
- Use a mallet or your fist to firmly press down the vegetables before adding more.
- After pressing/packing down, add 2-3 more handfuls of the mixture along with a scoop or two of the brine.Again, press & pack down with the mallet. Repeat until all the contents are in the jar.
- Pour the remaining brine into the jar until there is about a 3 inch (8 cm) headspace.
The Cabbage Leaf Topper
- With one of the cabbage leaves set aside from earlier, tear a piece of it to be placed in the jar. The goal is to create a cabbage leaf topper to cover the greens & vegetables below.Press the edges of the cabbage leaf down along the side of the jar to create a friction that will hold the leaf in place. Use several cabbage pieces if needed until everything is fully covered by the topper.The cabbage leaf topper will help prevent vegetable & spice floaters from rising during the fermentation process. However, it is not intended to be a fermenting weight substitute, rather an addition.
The Fermentation Weight & Lid
- Place the fermentation weight into the jar and press it down.
- If you have any remaining brine in the mixing bowl, pour it over the fermenting weight until it is full submerged.
- Inspect the surface for any food floaters and remove them.
- Place a regular, loose lid on the jar. So long as the lid is loose, fermentation gasses will be able to escape without having to burp the jar. You are welcome to use a specialty fermenting lid if you have one, but it is not required.
The Fermentation Period
- Leave the jar on the counter at room temperature (70-80°F / 21-27°C) for 14 to 21 days.
- Place the jar on a towel or a plate to catch possible brine overflow during the fermentation process.
Kahm Yeast
- It is possible that the fermentation will develop kahm yeast on the surface. Kahm yeast is harmless and not something to be concerned about.Do not try to clean it off during the fermentation period. Rather, once the fermentation is complete (14-21 days) that is the time to remove the kahm yeast.
When is it Ready To Eat?
- Feel free to take a taste test around day 14 by removing the fermentation weight and using a clean fork to reach into the kale mixture and remove a bite. If it tastes delicious at this point, then you may proceed to end the fermentation.If you would like more flavor to develop along with increased sour-tartness, then re-wash the weight and put it back in the jar. Return the loose lid and allow the kale to continue fermenting for another week.
End The Fermentation
- Similar to the taste test process, with clean hands reach in and remove the fermenting weight.If kahm yeast developed on the ferment, the removal of the weight will take with it most of the kahm yeast. Then use a paper towel to wipe out the inside of the jar and dab up any remaining surface kahm yeast pieces.Do not worry if you are not able to remove 100% of the kahm yeast since it is harmless. Watch my Fermented Kale & Swiss Chard video to see a visual demonstration of the process.
- Do not return the fermenting weight to the jar. Place a tight lid on the jar and move it to the refrigerator for long term storage. The fermented kale or Swiss chard can last 6+ months in the cool temps of a refrigerator. Tip #1: When starting a jar to eat, you may also eat the cabbage leaf topper (it too is fermented).Tip #2: If the fermented greens will be in the refrigerator for awhile before eating, leave the cabbage leaf topper in place because it will help protect the food below during storage.